| MARK WINTLE | |
|

Beginner’s Essentials 4 – Buying Other Gear 1Having got a rod and reel there is more essential gear to buy. Reels must be loaded with suitable line. You’ll need hooks, floats, shot, leger weights, swimfeeders, etc. You will also need a landing net and tackle to enable easy unhooking of the landed fish, such as a disgorger and forceps.
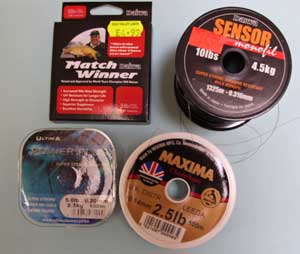
In ‘Beginner’s Essentials 3’ we looked at the types of rods and reels suitable for each style of angling and the breaking strains of lines suitable for them: Light floatfishing – 2 to 3lbs BS – target roach, rudd, dace, small bream & chub and perch. The whole concept of describing the styles of fishing, the right rods and reels for them and matching the lines (and hooks too) is known as balanced tackle. Not only does it feel right to fish with, it also means that each part of the tackle is in harmony, reducing the chance of tackle breakages. Sorting out reel linesThe lines that you load your reel with need to be tough and reasonably limp. Limp means that they do not constantly spring off in tangles. Some lines are designed to be very fine for their breaking strain. These are commonly used for hook links (the last two feet of the rig with the hook is usually separate from the main line and of slightly lower breaking strain than the main line), or for pole fishing where the wear from the reel and rod rings is eliminated. Some reel lines that have stood the test of time and are widely available are Maxima, Daiwa Sensor and Drennan Floatfish. The Sensor line is especially good value at £ 7 for a bulk spool – the 4lb bs gives you about 2 miles of line! This line isn’t the best on the market but it is cheap, strong and tough, and at that price unbeatable. For fine line fishing with 2 to 3lb line then Maxima or the Drennan Floatfish are both reliable.
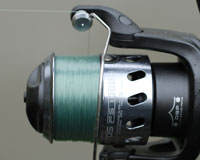
When you buy line it generally comes on 100 metre spools and for the vast majority of fishing which is carried out at short range – up to about thirty yards – this is ample. It is only if you start to do serious long range fishing – hardly recommended for a novice – that it is vital to have two hundred metres in a continuous length on the reel. It is also possible to buy bulk spools that are sold by weight – 4oz of line. These are useful for very cheap refilling of your reels. Apart from the length of line on the spool there will be two other pieces of information on the label; the diameter that is measured in hundredths of a millimetre, eg, 0.20, and the breaking strain measured in kilograms or pounds. Lines that are sold as reel lines generally have their breaking strains understated so that a line rated as 4lbs might actually break at five pounds, provided your knots are good. This does give you a safety margin but it is dependent on the line being reasonably new and in good condition. For this reason many anglers remove the last few yards of line after each trip as it will become worn. This is especially true of fine lines or when doing fishing that is very demanding, such as feeder fishing. When changing lines or removing the last few yards ensure that you bundle it up and cut it into very small lengths before binning it. Don’t discard at the waterside! The spools on your reel will probably have a capacity far in excess of the 100 metres that is needed for most fishing. That means that it is important to fill the reel with backing line until the amount of room left is just enough for a typical 100 metres spool. The only exception is if you have a reel with shallow ‘match’ spools’. The spool needs to be filled to within about 1/8 of an inch (3mm) of the spool lip) – see picture. To get this right with backing the easiest way is – assuming you have two identical spools for the reel – to wind on the 100 metres of main line onto one spool followed by the required amount of backing (get a bulk spool as above of line slightly stronger than the intended line), until the spool is correctly filled, then transfer the backing and line onto the other spool so that the backing is now underneath with the main line on top. Then when you want to replace the mainline it is easy to just add 100 metres of it. Ensure the line is wound on under slight tension by running it through your fingers. It is best to mount the reel on your rod to do this. You will only need the handle section of the rod. Thread the line through the first rod ring before tying any knots!
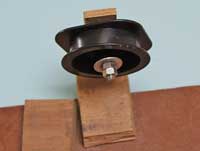
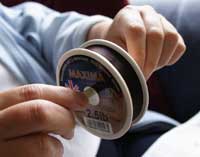
When adding line to a fixed spool reel you will need to anchor it to the spool in the first place, and if adding a line to the backing line, to join the new length to it. To tie the end of the line to the spool you need to loop the line around the spool and tie a slip knot (half blood knot) around the line. Then, after wetting the knot, carefully tighten the loop and trim the loose end. You need to get the slip knot to hold the end of the line tightly as otherwise you won’t be able to wind on the line as it will rotate around the spool as you turn the reel handle. To attach a length of line to backing line there are several suitable knots; the best one is a water knot although a double blood knot will suffice. Whichever one you use, make sure that the trimmed knot ends do not protrude from under the wound-on line, as this will impede casting especially with fine lines. Another way is to leave the tag ends a little longer and then they’ll flatten as line is wound over them. Having anchored the end of the line to the spool you need to wind on the line from the line spool. With the reel mounted on the rod, and line threaded through the first ring you have some control of the rod and reel so that gently running the line through a couple of fingers of the hand holding the rod can be accomplished. But how best to get the line to leave the spool? There are two schools of thought on this. One is to let the line come off the end of the spool. There is a danger in doing it this way in that you can introduce twists into the line. The way I prefer is to run the spool on a spindle so that the line spool rotates. You can persuade someone to hold the spool mounted on a pencil whilst you wind on the line, or you can make a device to hold the spool. Yet another method is to chuck the spool into a bucket of water and let it tumble around as you wind the line from it. This method also wets the line so that it runs through your fingers more easily.
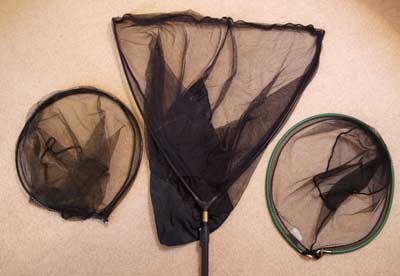
Underneath the reel, most usually, you will find a little lever that prevents the handle being turned the wrong way – known as the anti-reverse switch. Flick this lever on so that the line must be wound on the reel the correct way (you will only be able to turn the handle the correct way). It is not uncommon for novices to wind the line on the wrong way then wonder why the reel does not seem to work very well. You will also need a spool or two of line for hooklengths, and this should be of a slightly weaker breaking strain than your main line. The line on your reel will not last forever! Fine lines of two or three pounds breaking strain may need replacing as often as every couple of months if used twice a week; heavier strains should last a little longer though feeder fishing, especially if you are casting out a heavy feeder regularly, really takes its toll on line. If a line ever looks or feels abraded or rough then change it immediately. Certainly, always change your lines at least once a year. Cut up the removed line into short lengths before putting in the dustbin. Landing GearA small fish can easily be swung without unduly stressing the rod and line but to land anything much bigger than seven or eight inches long you will need a landing net. The general set-up with landing nets is that the head – the frame with netting – is available separate from the handle. The two join together using a standard screw thread. In describing the fishing styles previously the size of target fish for each type of fishing will also guide the most appropriate sized landing net.Although smaller sizes are available, the smallest practical landing net is a pan-type net of 20″ diameter, and this is fine for fish up to four or five pounds. For the float fisher after roach, dace and perch, and possibly average sized chub and bream, this will prove ideal.
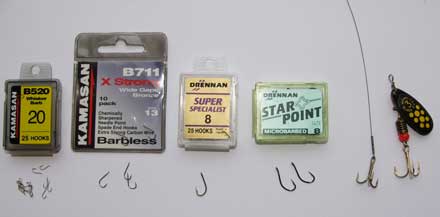
Start to catch bigger fish; small carp, big chub, barbel, bigger bream and tench, and a deeper net with a 24″ rim is generally adequate. Such a net would easily cope with carp to twenty pounds and barbel to well over ten pounds. For fishing for big pike and carp then a specialist net of 36″ or 42″ is required. Bear in mind that the bigger and heavier the net the more difficult it is to manoeuvre. HooksThere are two basic types of hook, the spade-end and the eyed, of which there are many different patterns of each. Generally, eyed hooks are for thicker lines when fishing for bigger fish – the big chub, barbel and carp fishing styles. Spade-end hooks are for light lines, tie more neatly, and therefore give a better presentation of the bait – the floatfishing and legering styles. (See ‘Knots’ section for spade-end and eyed hook knots).Hooks are made in different sizes denoted by a number. Conventionally, even numbers ranging from the largest size 2, to the smallest size 22. It is possible to buy larger and smaller hooks, but you won’t need them at this stage. One of the largest hook manufacturers in the world, Mustad, use odd numbers to size their hooks, and in many instances the odd size is exactly right for the job.
The size you use depends on the size of the bait. For instance, a single maggot is suited to a size 20 or 21 hook, whereas a grain of sweetcorn is better fished on a size 14 or 15. For carp fishing, when using boilies, pastes and bigger pellets, bigger hooks such as an 8 or 6 is used. Don’t even try to understand the different patterns of hooks until you have quite a bit of experience. If you stick with a bronze, crystal bend, micro-barbed, chemically sharpened, spade-end hook in sizes 22 to 14, and similarly patterned, eyed hooks in sizes 12 to 2’s, you won’t go far wrong.
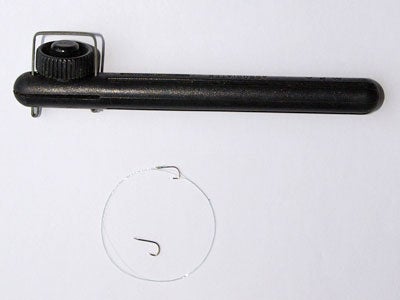
You can also buy hooks ready tied to nylon, especially in the smaller sizes, which may suit you better than tying your own until you have more confidence in your knots. More Gear to Follow!At this point we’ve only covered the basics of rods, reels, lines, nets and hooks; there are many more items of tackle to look, something the next article will cover before we move onto the basics of actually fishing.
|