
D
Dave Coster
Guest
GETTING ORGANISED

A big mistake I see people making is not getting their gear properly laid out when they set up, with kit strewn everywhere. Things can go badly wrong if you need to keep moving about to reach items, risking accidentally trampling on something important. A common error is not having a landing net within easy reach. Match anglers always look tidier than most, despite having twice as much tackle. There’s a reason for this, because they want to maximise their time in order to do well. Delays cost vital fish, which is why everything required is positioned close to hand. If you need to stretch to get at your bait, keepnet, terminal tackle, or essential tools, you are doing it wrong. By setting up more thoughtfully, without having to look where anything is, results can only improve. When tackle is better organised, everything you do is faster and smoother. This creates more time spent with a baited hook in the water, which translates into catching more fish.
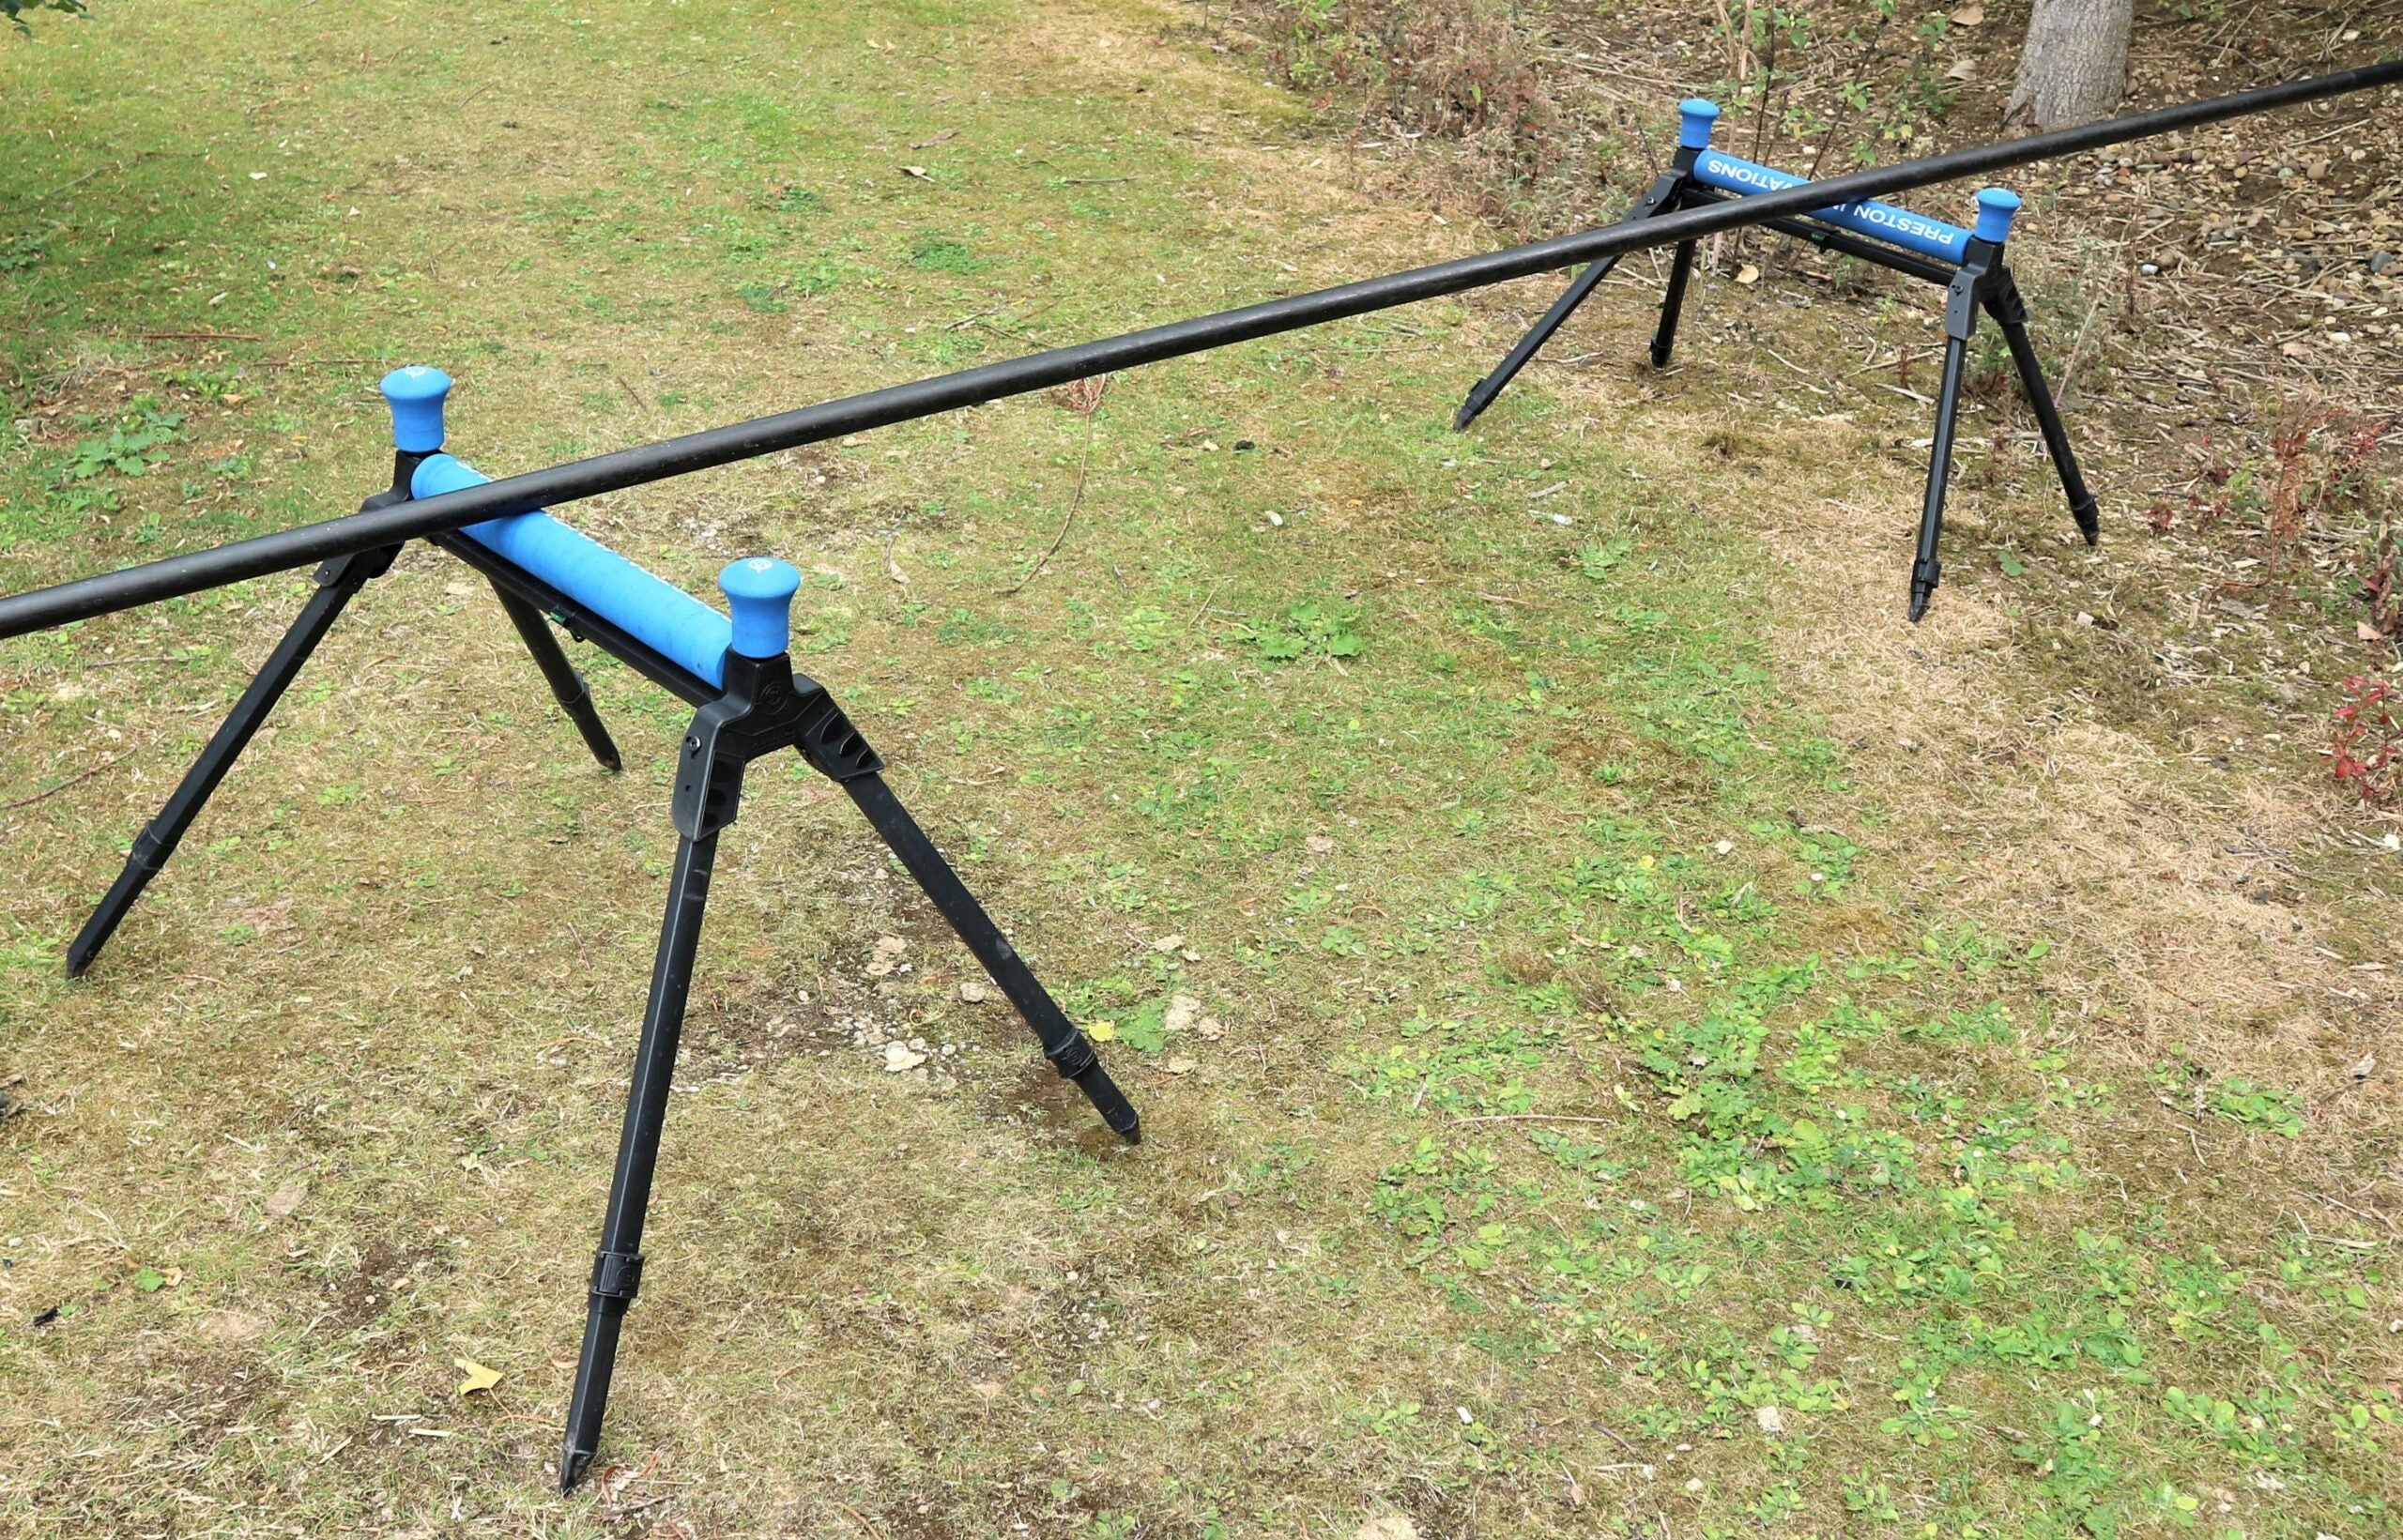
DOUBLE FLATS
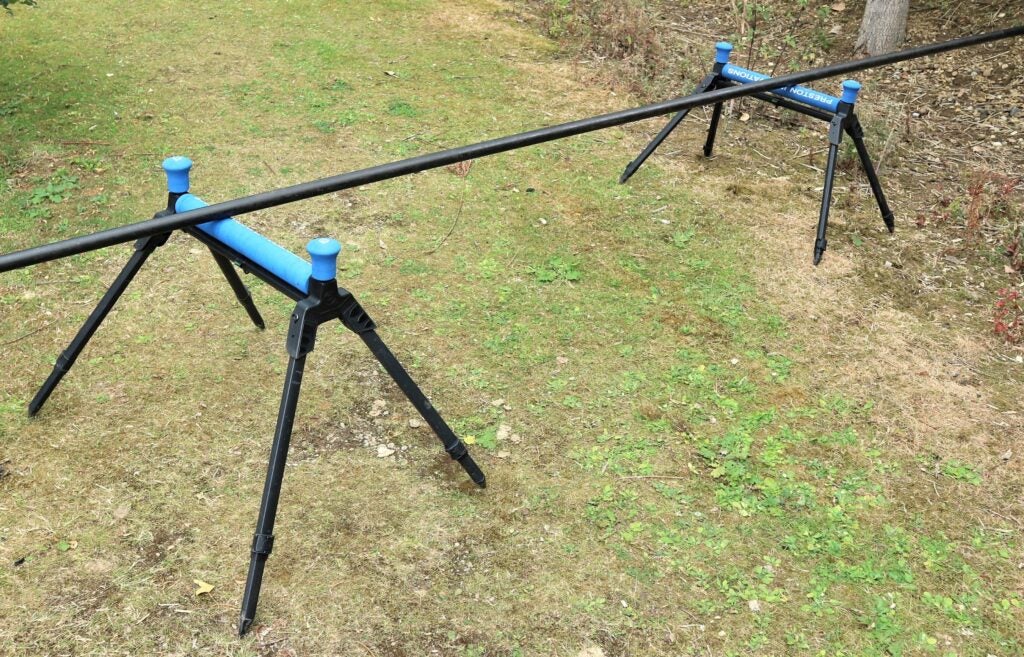
Using double pole rollers, particularly flatbed designs, is now common practice in match fishing. This makes everything run a lot faster when shipping out long poles and bringing them back. It’s so much speedier when there isn’t a fish attached, and a lot smoother if there is. Once you get pole sections travelling back when a fish is on, double rollers help to cushion sections, reducing chances of bumping the hook out. But you don’t need to be competitive to benefit from using two rollers. By keeping expensive pole sections completely off the ground, they are less likely to get damaged, or covered in muck. It makes pole fishing more pleasurable by not having to constantly worry about clashing with anything, because dual rollers channel sections exactly where you want them to go. If you have ever relied on one roller, you will know it produces a much wider arc regarding where the butt of the pole can end up, requiring lots of extra care and attention.
REACHING HIGH
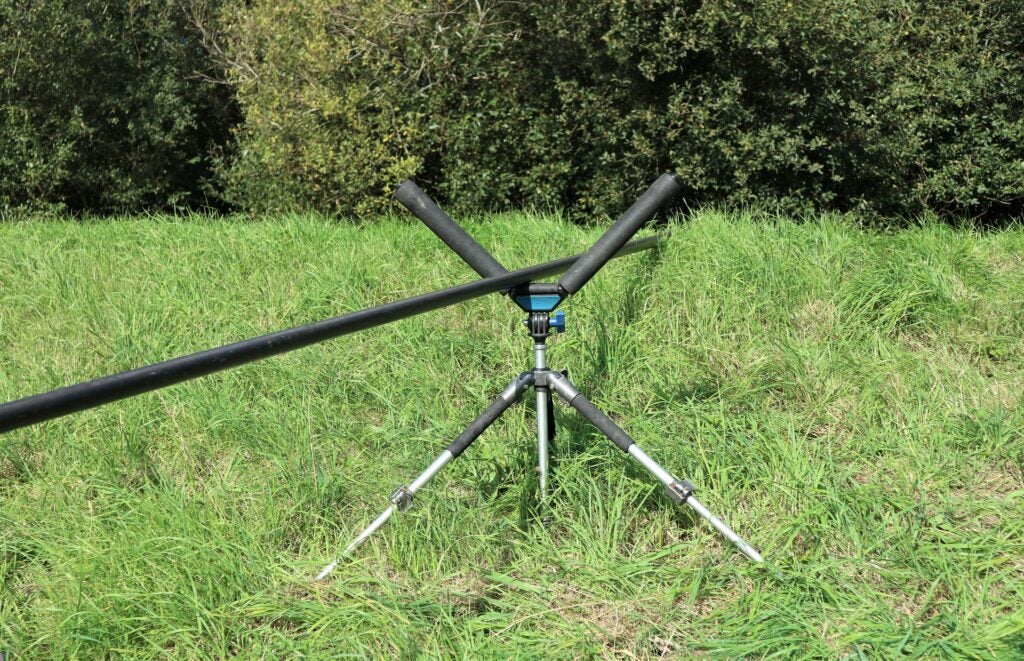
Flatbeds are most popular, but there is a place for “V” shaped tripod-style pole rollers, particularly on venues that have high grassy banks behind. You often find this type of obstacle on fens, drains, small rivers and canals, where the terrain has been built up by heavy machinery. You only normally need the one roller in this instance, to help guide your pole onto the feature, where it will then glide smoothly over it. Tripods offer greater height adjustments than flatbeds, plus the deep nature of a “V” roller is less likely to see the pole blow out when it’s windy. It’s also possible to use a tripod roller in front of a flatbed, should you want the best of both worlds. Tripod roller designs help to channel the pole in a more direct line as it’s unshipped, while having a wider flatbed version behind, provides easy secondary location. A single pole roller, positioned over to one side, works best when the pole needs to be swung round out of the way on busy canal towpaths.
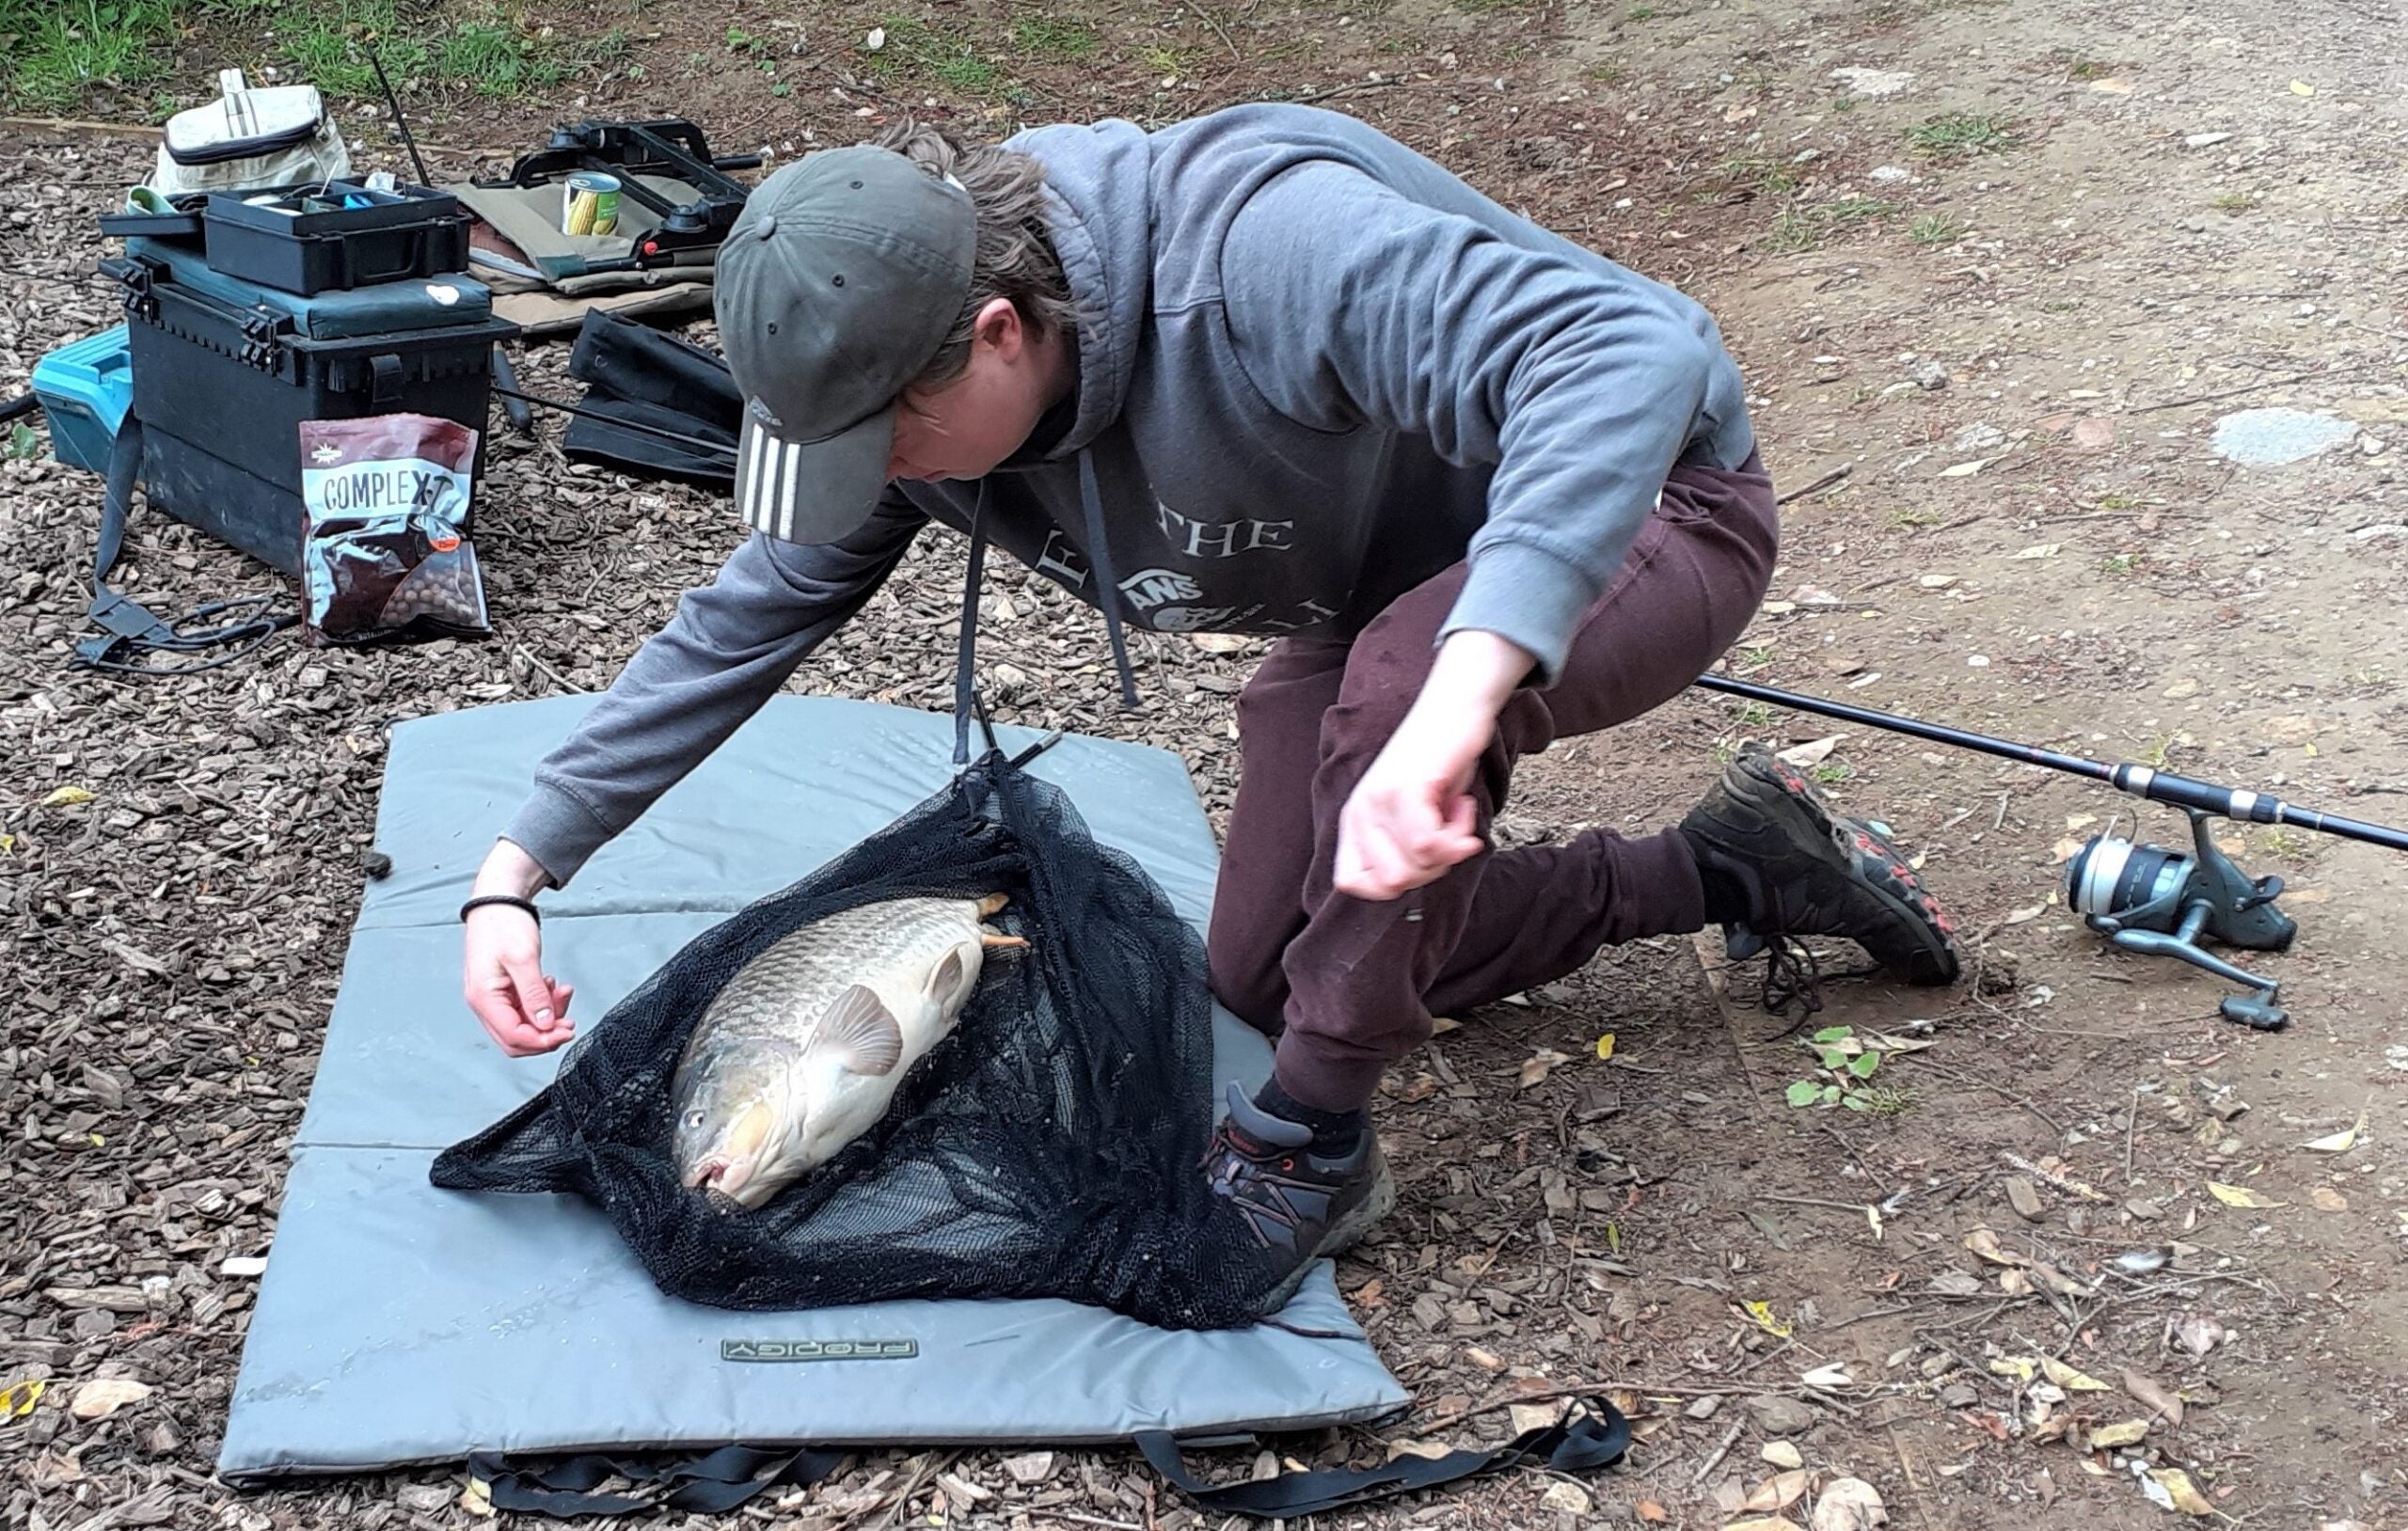
VERSATILE MATS

Unhooking mats are compulsory on many fisheries, preventing lively fish from ending up writhing about over chippings, sand, soil, wooden boards, concrete, or gravel that many swims are made up with. I for one don’t like seeing prime fish laid out on grass either. Much better to do this on an unhooking mat, even if your catch is in a landing net, or a keepnet. It’s no hassle carrying a padded mat with the rest of your kit, plus it has other practical uses. I sometimes use mine to sit on when fishing from high banks. I also like the mat positioned next to my holdall when it’s flat on the ground. It’s more comfortable to kneel on while selecting items like rods, poles, top kits and metalware. Apart from unhooking, a mat is handy for taking photographs of big fish or good catches. It makes an okay backdrop and is much kinder than a towel. My mat is just big enough to wrap around my wet nets, so I can run them through the house to dry out in the back garden.
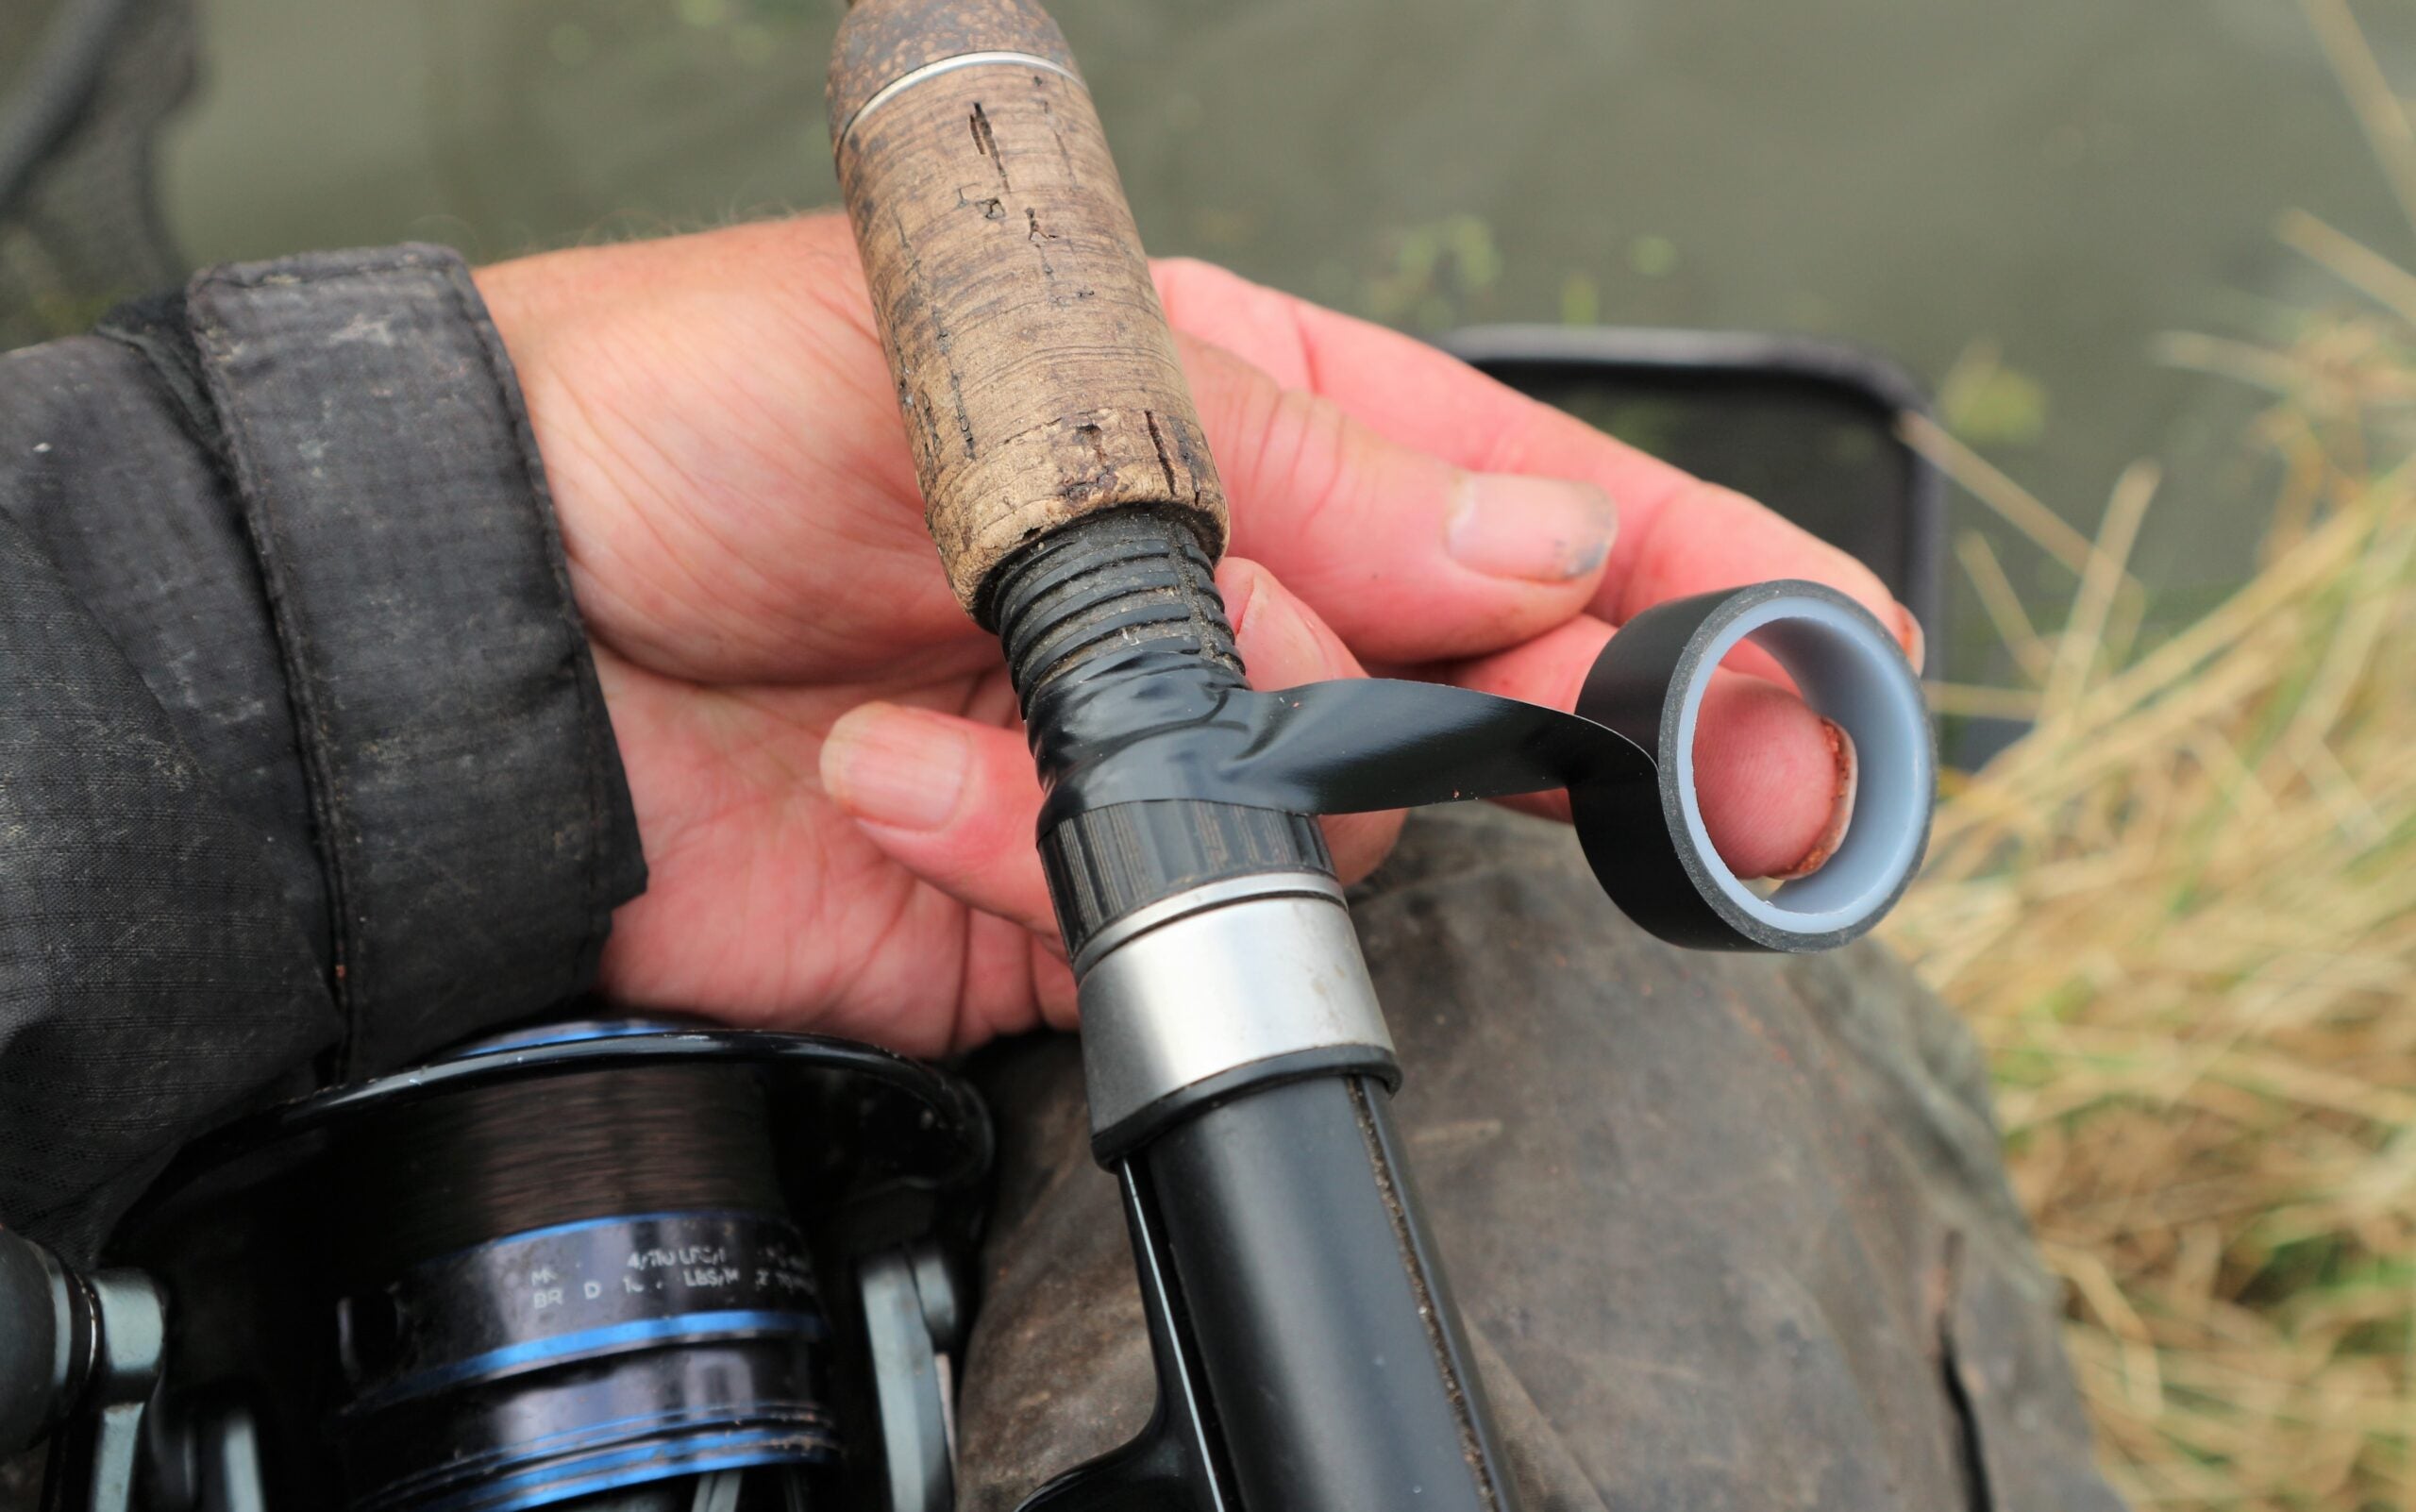
TAPING IT

One of the most annoying things I have ever encountered while fishing with rod and line is screw-down style reel seats that keep working loose. Most designs do this, due to constant casting and rod hand movement, which risks the reel falling off the handle eventually. The best way of fixing the problem is to wind a couple of turns of waterproof EVA electrical tape around the screw down-locking part, which keeps everything solid for the session, while still being easy to peel off afterwards. I always have a spool of this useful tape in my kit because it’s handy for other on-the-bank fixes. I’ve used it after telescoping a broken pole section back together, covering up the break and reinforcing it. I also like this gear for taping up perforations on open-end feeders, to make bait release slower in deep water. Other fixes have been to reinforce pole sections when fitting puller bungs on top kits, also to stop rod rest heads swivelling out of place.
LIFTING RIGHT
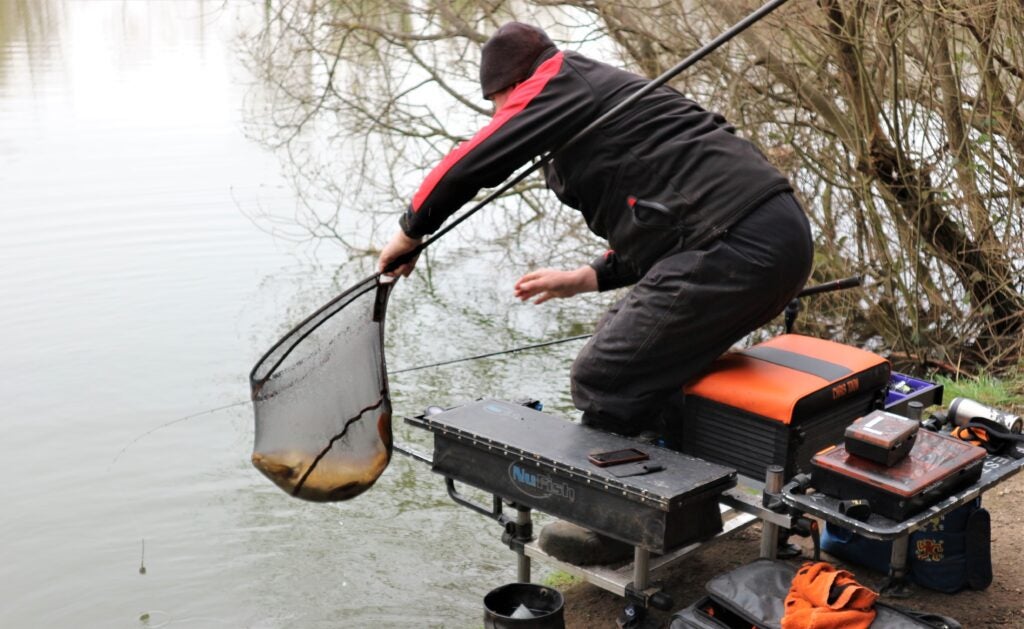
If you ever hear a loud crack out on the bank, apart from a carbon pole or rod section snapping, one of the main culprits is likely to be a landing net handle. A big mistake I see many novices making, is trying to lift big fish out of the water just after they have been netted, forgetting to pull the handle back first! The proper way to use a landing net, especially with long handles that are popular for fast netting, is to pull the net across the surface and to grab its spreader block. If you lift your catch this way there will be no pressure on the handle, plus it takes a lot less effort to hoist everything out of the water. If possible, unhook your capture in the net, so it can then be lowered back into the water, or inside the head of a keepnet. This way the fish is hardly touched and stays in pristine condition. Longer landing net handles are mainly used for quick netting of big bream and carp, while shorter ones are much better for speed when bagging medium-sized species.
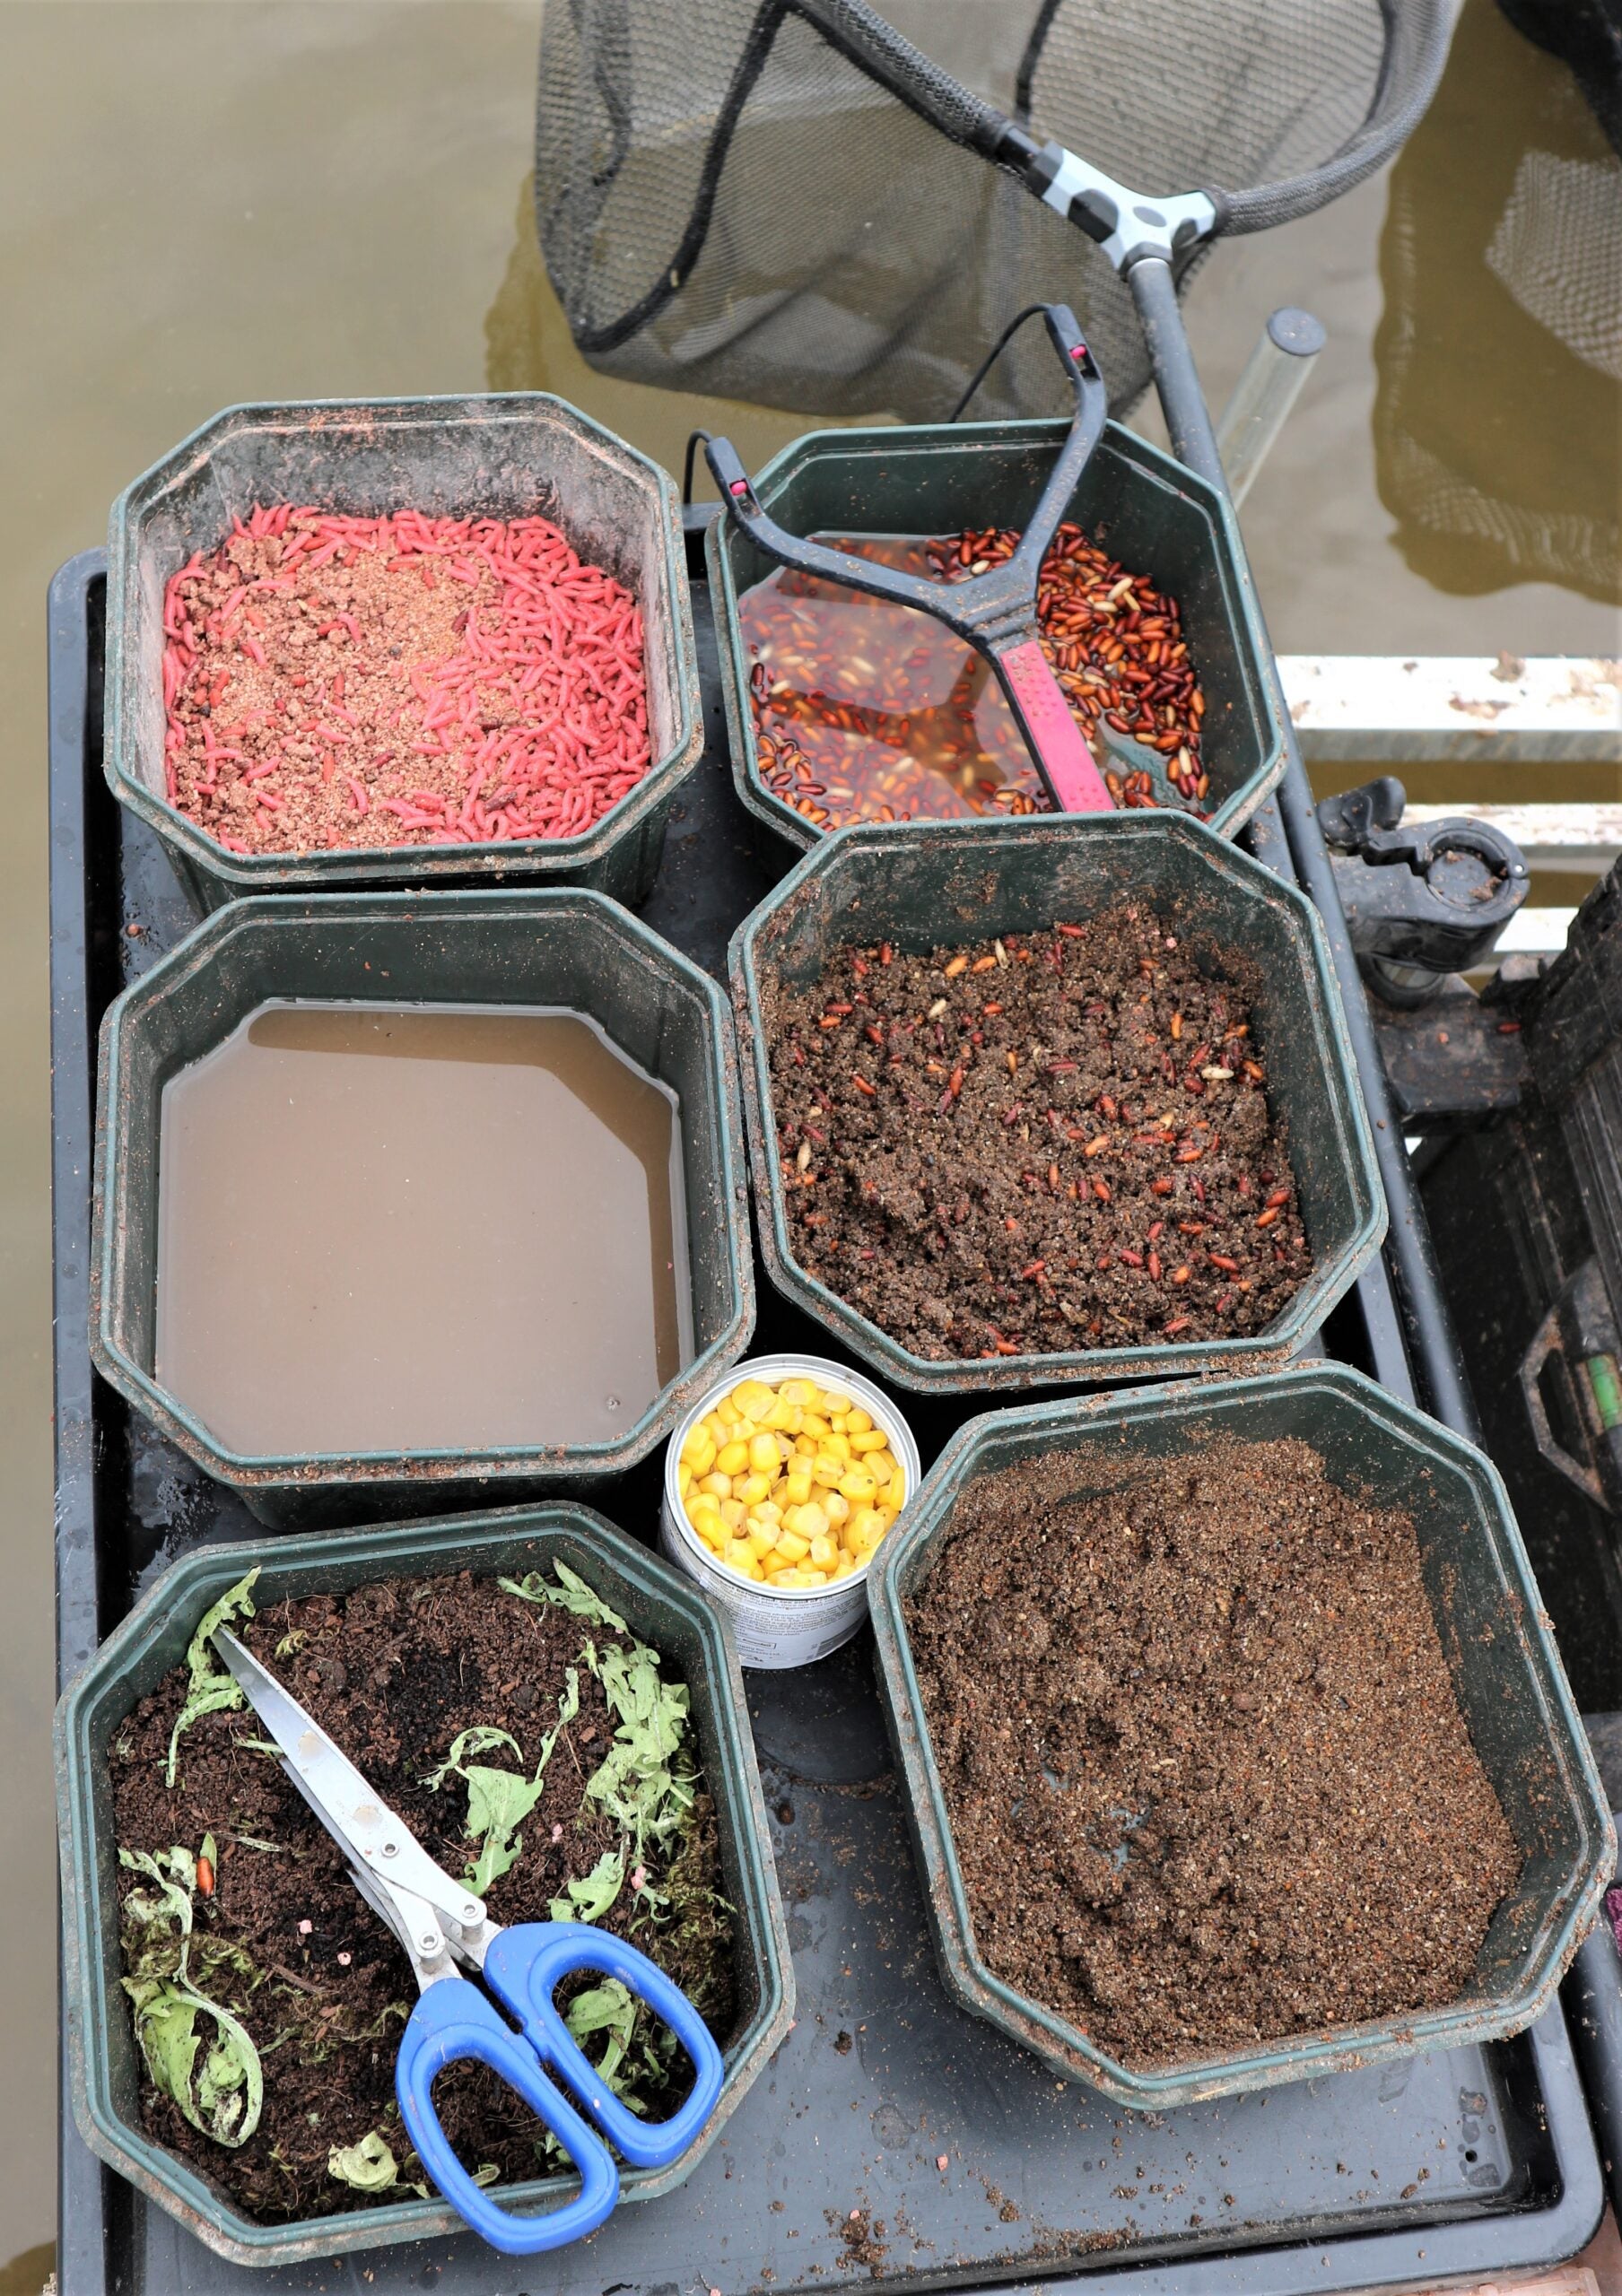
FAST FOOD

Whatever type of fishing you do it helps to have your bait properly organised, with everything close to hand. This allows you to concentrate on the most important part of the job, encouraging bites. It helps to have reserve groundbait ready, to save stopping the action to mix up more. It’s also a good idea to have a decent selection of baits set out, allowing fast changes to find what the fish want. Items associated with bait, such as chopping scissors and a catapult, should always be on bait tables or trays too, ready for action. If you want a big selection of bait, it’s better to use smaller tubs or boxes, rather than cluttering up a tray with big bowls, which don’t leave room for much else. I always have a tub full of water to keep my hands nice and clean, otherwise rod handles and pole sections get caked with groundbait and fish slime. Many anglers use lidded bait stations, which is a great idea when it’s wet, although I find flip-top bait boxes good enough.
BAGGING UP
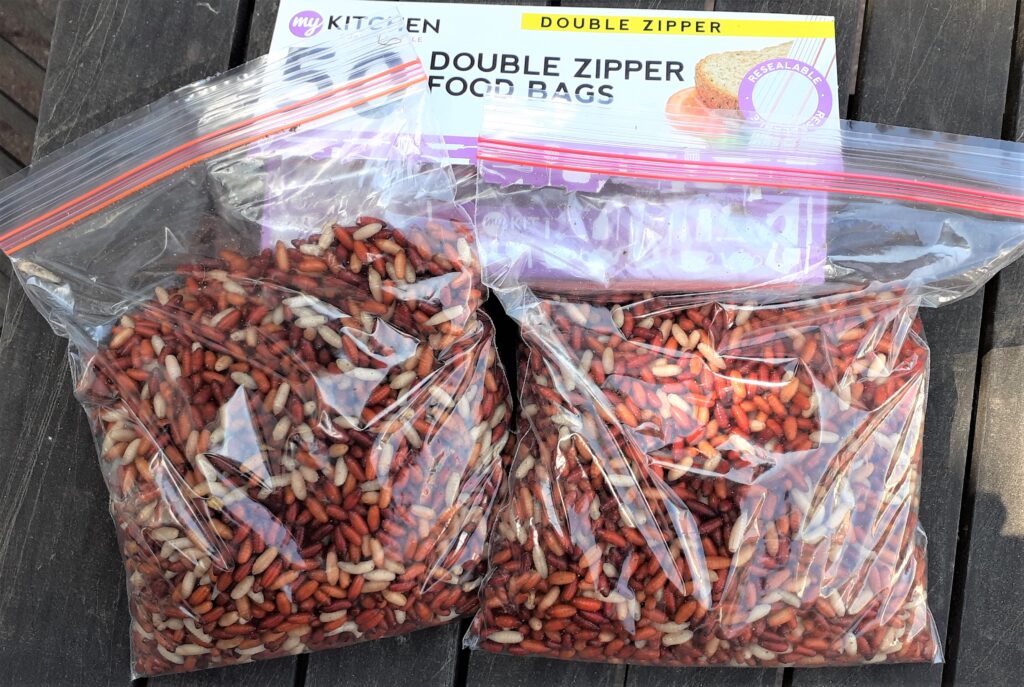
Most of us use polythene food bags to store various baits in. I first became aware of the different quality of plastic bags when I used to run a tackle shop. I noticed casters kept better in thicker types, quickly getting burn marks with thinner, cheaper options. Since then, I have discovered food bags with zippers are best for keeping casters in tiptop condition, along with many other baits. There are two main advantages with self-sealing bags. The first is they are easy to open, while basic knotted versions can prove impossible to get into without damaging. The second plus factor is casters in particular store better and for longer in zipper bags, providing you breath the bait every day and keep it in a fridge. I can keep casters in perfect condition for at least a week by using this option, while when they are kept in standard clear bags, they start to turn rubbery and grey after only two or three days. Food bags with double zips are the best by the way.
STICK & BOMB

A great trick I have learnt over many years of river fishing is to bring a small bomb, or leger weight, into play towards the end of a stick float session. I normally have this tackle set up on a light action 10-11ft quivertip rod, using a free running weight and short 12inch hook length. After flogging a swim for several hours with a float, the bites dry up eventually. But by introducing something different in the form of a stationary bait, they often come back again. The best way to use leger tackle is by working it down the swim, while still continuing to feed the same way you were when float fishing. Stay with the same baits too, whether maggots or casters, even tares or punched bread. Normally there will be a hotspot that produces positive bites, where the fish are still resident in the swim, but not responding to moving hook baits. It’s worth exploring the tail end of long trots too, where bigger fish could be hanging back from the main action.
NEAT LINKS
Several companies produce feeder links, which have become very popular, although this is not a new concept. I can remember similar Powergum feeder links that were in tackle shops over 30 years ago, but the newer ones are different in that they are generally made from stiff and strong fluorocarbon. I like Guru links because they are covered in dull green shrink tube, so they blend in well with their surroundings. They have snap swivels one end and small plastic eyes the other. This format allows quick changes of feeder and to have paternoster style rigs that are free running. I like using these smart gismos with groundbait feeders, although they will work with maggot designs. They perform best if the feeder has no link, or at least only a short one already fitted to it. Apart from being able to change feeder sizes or designs in seconds, without having to break rigs down, feeder links allow a switch to leger weights to give swims a rest from regular feeding.
ON THE SPOT
Measuring sticks help to gauge exactly how far out you are fishing. This is useful for a spodding rod, to get bait accurately where your main rig is landing. It’s handy knowing the distance anyway, in case you lose some end tackle and line, also having a reference point for return visits to venues. Feeder anglers often prefer measuring or distance sticks, because they are more reliable than counting turns of the reel handle, which used to be how casting range was calculated. Having two sticks pushed in the ground, set between three or four metres apart, allows line to be wound off your reel to find out the distance. This can be done after trial casting and clipping up the main line or braid, or before an initial cast if you know what distance you need to cover. Measuring sticks are only a starting point. It’s not unusual for anglers to tweak distances as sessions develop, unclipping a few turns of main line to see if the fish have moved further out from feed areas.
BIGGER SPLASH
It makes me laugh when I see all sorts of fancy rod movements as some anglers cast out feeders, sweeping the blank backwards and forwards while the end tackle is in flight, trying to avoid hitting the line clip too hard. Accuracy is important, along with sometimes feathering the feeder, so it lands more quietly. But on just as many other occasions a feeder crash-landing on the surface is a like a dinner gong to the fish, which associate the disturbance with free food. Method, hybrid and pellet feeders can actually work better if you splash then down noisily, pulling bites almost instantly. Providing your reel has a kind, spring-loaded line clip, it pays to let your feeder hit it and make a proper splosh! If you are worried about the clip damaging your line, wind a couple of turns of soft braid around it and trim off the tag ends. After that mono or braid shouldn’t damage when hitting the clip. It also helps if you trap reel line with two turns around a clip.
The post Top Tips first appeared on FishingMagic Magazine.
Continue reading...
A big mistake I see people making is not getting their gear properly laid out when they set up, with kit strewn everywhere. Things can go badly wrong if you need to keep moving about to reach items, risking accidentally trampling on something important. A common error is not having a landing net within easy reach. Match anglers always look tidier than most, despite having twice as much tackle. There’s a reason for this, because they want to maximise their time in order to do well. Delays cost vital fish, which is why everything required is positioned close to hand. If you need to stretch to get at your bait, keepnet, terminal tackle, or essential tools, you are doing it wrong. By setting up more thoughtfully, without having to look where anything is, results can only improve. When tackle is better organised, everything you do is faster and smoother. This creates more time spent with a baited hook in the water, which translates into catching more fish.
DOUBLE FLATS
Using double pole rollers, particularly flatbed designs, is now common practice in match fishing. This makes everything run a lot faster when shipping out long poles and bringing them back. It’s so much speedier when there isn’t a fish attached, and a lot smoother if there is. Once you get pole sections travelling back when a fish is on, double rollers help to cushion sections, reducing chances of bumping the hook out. But you don’t need to be competitive to benefit from using two rollers. By keeping expensive pole sections completely off the ground, they are less likely to get damaged, or covered in muck. It makes pole fishing more pleasurable by not having to constantly worry about clashing with anything, because dual rollers channel sections exactly where you want them to go. If you have ever relied on one roller, you will know it produces a much wider arc regarding where the butt of the pole can end up, requiring lots of extra care and attention.
REACHING HIGH

Flatbeds are most popular, but there is a place for “V” shaped tripod-style pole rollers, particularly on venues that have high grassy banks behind. You often find this type of obstacle on fens, drains, small rivers and canals, where the terrain has been built up by heavy machinery. You only normally need the one roller in this instance, to help guide your pole onto the feature, where it will then glide smoothly over it. Tripods offer greater height adjustments than flatbeds, plus the deep nature of a “V” roller is less likely to see the pole blow out when it’s windy. It’s also possible to use a tripod roller in front of a flatbed, should you want the best of both worlds. Tripod roller designs help to channel the pole in a more direct line as it’s unshipped, while having a wider flatbed version behind, provides easy secondary location. A single pole roller, positioned over to one side, works best when the pole needs to be swung round out of the way on busy canal towpaths.
VERSATILE MATS
Unhooking mats are compulsory on many fisheries, preventing lively fish from ending up writhing about over chippings, sand, soil, wooden boards, concrete, or gravel that many swims are made up with. I for one don’t like seeing prime fish laid out on grass either. Much better to do this on an unhooking mat, even if your catch is in a landing net, or a keepnet. It’s no hassle carrying a padded mat with the rest of your kit, plus it has other practical uses. I sometimes use mine to sit on when fishing from high banks. I also like the mat positioned next to my holdall when it’s flat on the ground. It’s more comfortable to kneel on while selecting items like rods, poles, top kits and metalware. Apart from unhooking, a mat is handy for taking photographs of big fish or good catches. It makes an okay backdrop and is much kinder than a towel. My mat is just big enough to wrap around my wet nets, so I can run them through the house to dry out in the back garden.
TAPING IT
One of the most annoying things I have ever encountered while fishing with rod and line is screw-down style reel seats that keep working loose. Most designs do this, due to constant casting and rod hand movement, which risks the reel falling off the handle eventually. The best way of fixing the problem is to wind a couple of turns of waterproof EVA electrical tape around the screw down-locking part, which keeps everything solid for the session, while still being easy to peel off afterwards. I always have a spool of this useful tape in my kit because it’s handy for other on-the-bank fixes. I’ve used it after telescoping a broken pole section back together, covering up the break and reinforcing it. I also like this gear for taping up perforations on open-end feeders, to make bait release slower in deep water. Other fixes have been to reinforce pole sections when fitting puller bungs on top kits, also to stop rod rest heads swivelling out of place.
LIFTING RIGHT

If you ever hear a loud crack out on the bank, apart from a carbon pole or rod section snapping, one of the main culprits is likely to be a landing net handle. A big mistake I see many novices making, is trying to lift big fish out of the water just after they have been netted, forgetting to pull the handle back first! The proper way to use a landing net, especially with long handles that are popular for fast netting, is to pull the net across the surface and to grab its spreader block. If you lift your catch this way there will be no pressure on the handle, plus it takes a lot less effort to hoist everything out of the water. If possible, unhook your capture in the net, so it can then be lowered back into the water, or inside the head of a keepnet. This way the fish is hardly touched and stays in pristine condition. Longer landing net handles are mainly used for quick netting of big bream and carp, while shorter ones are much better for speed when bagging medium-sized species.
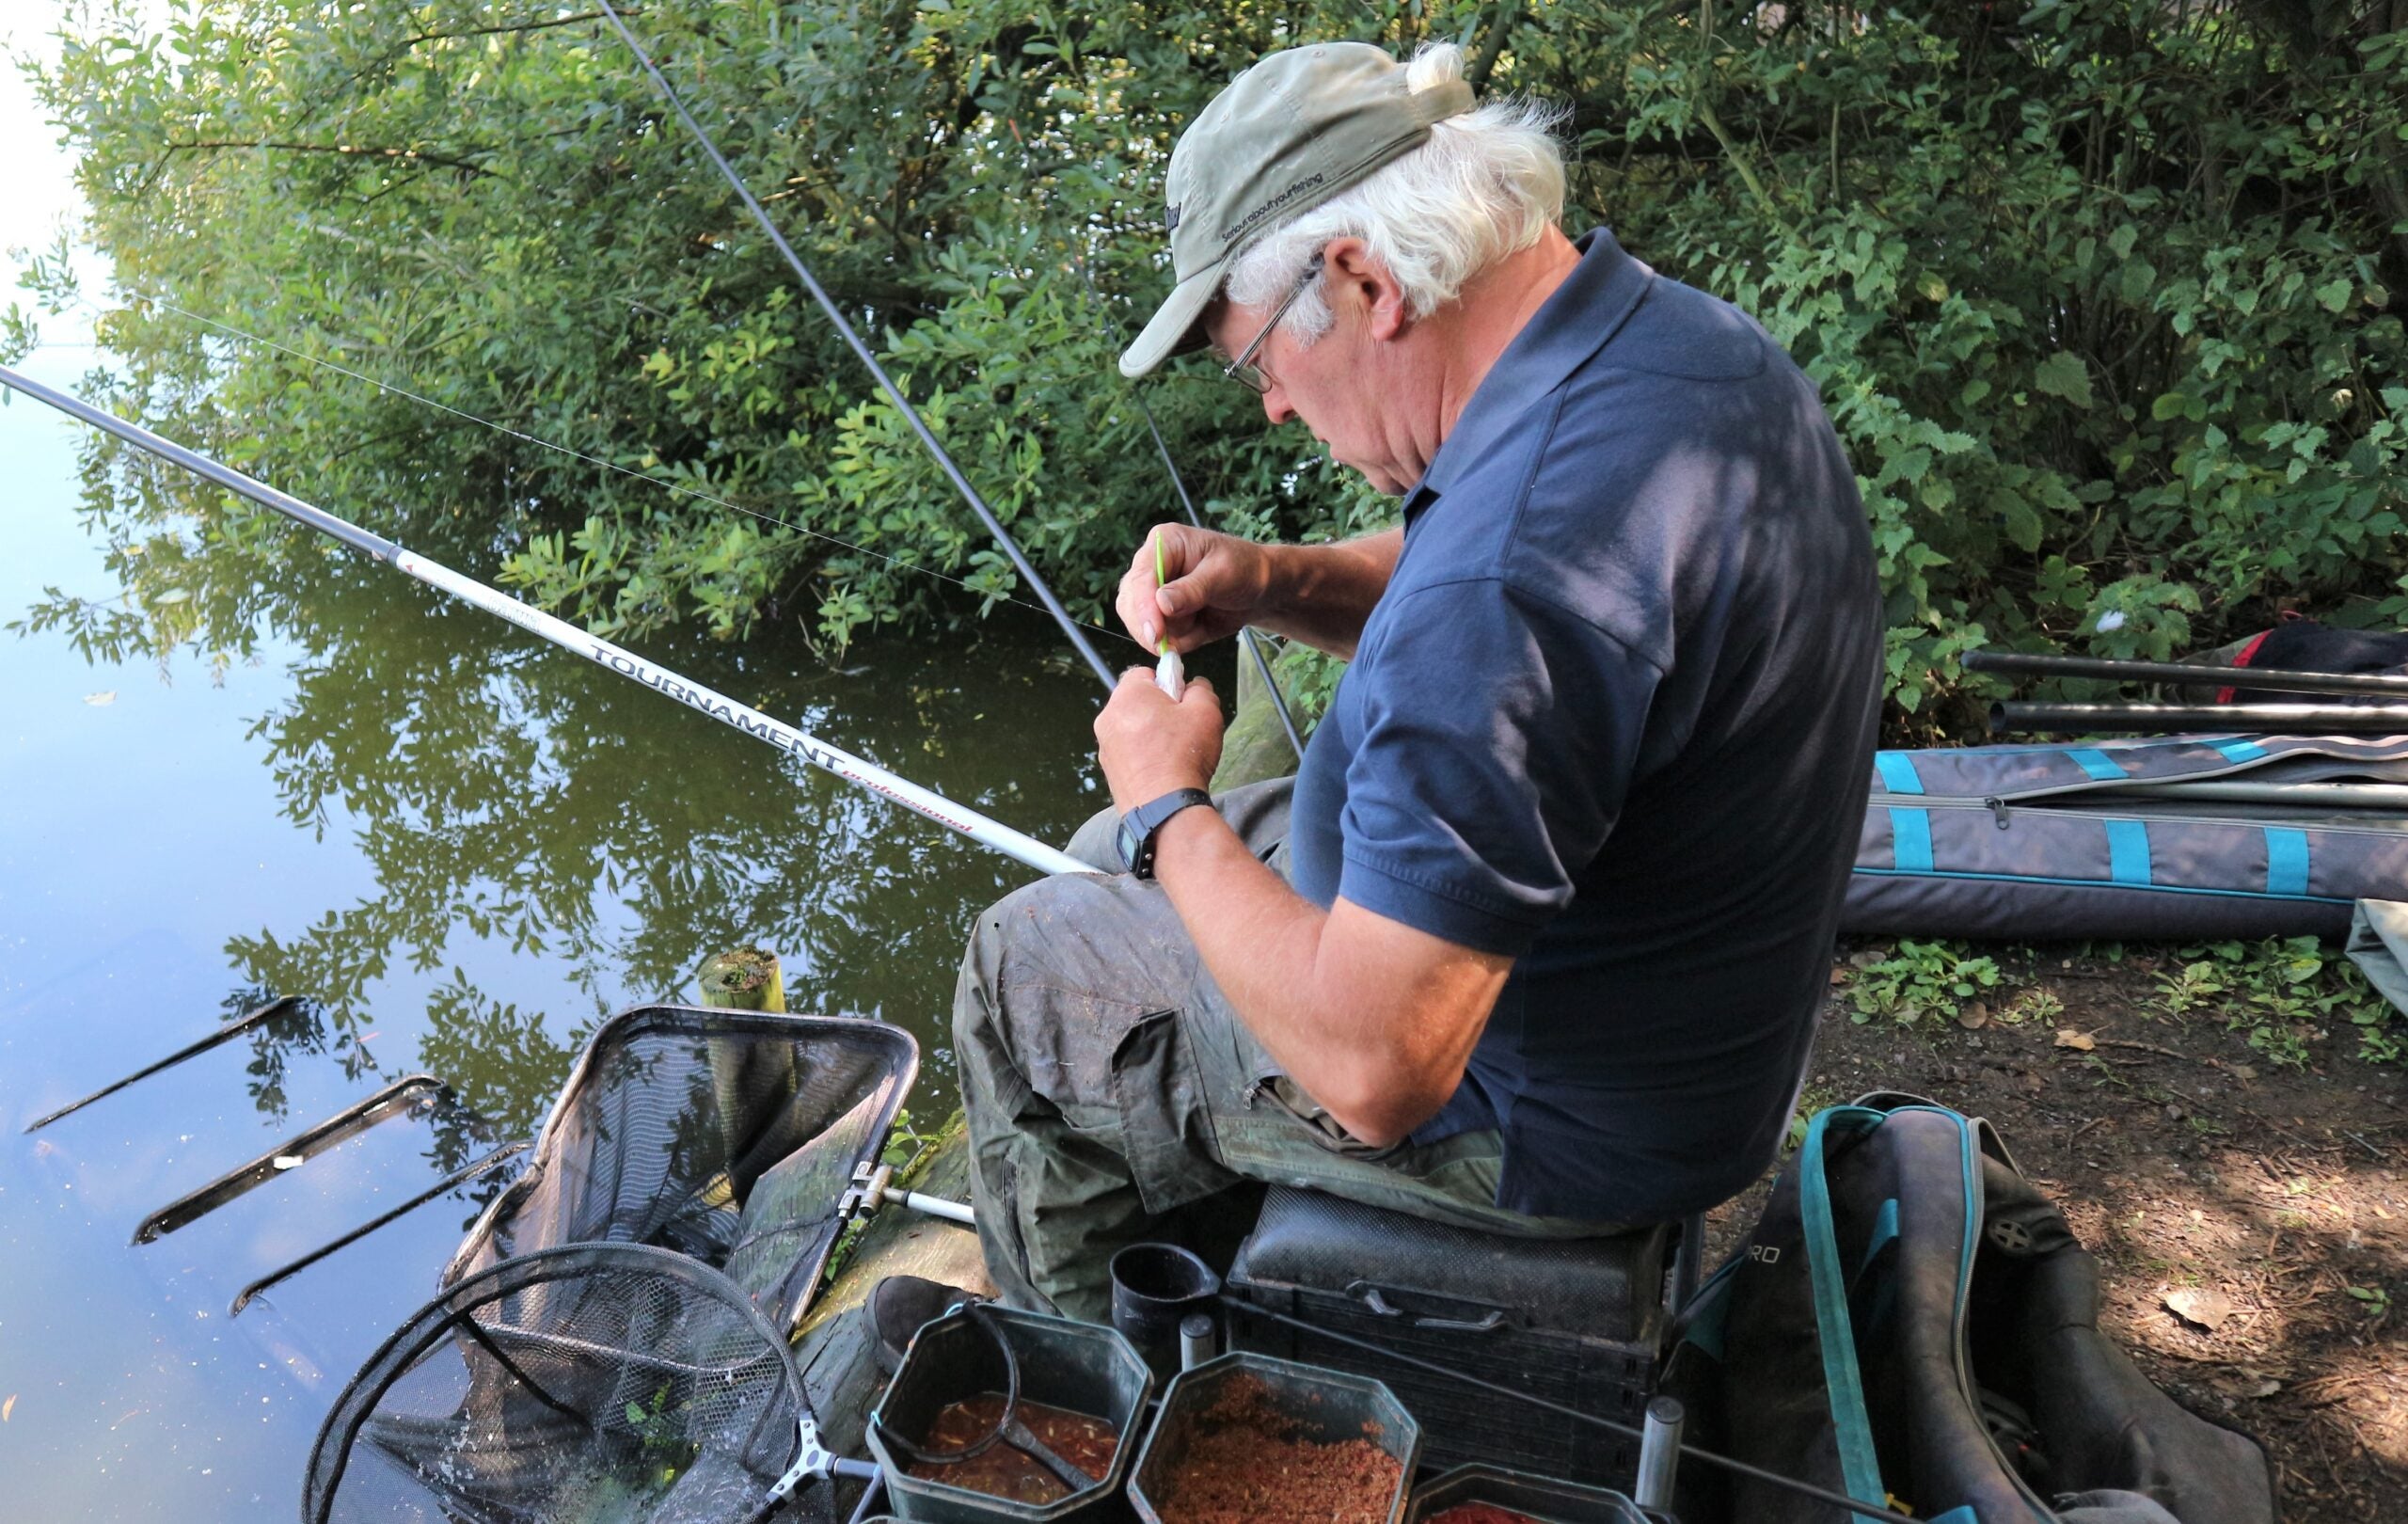
FAST FOOD
Whatever type of fishing you do it helps to have your bait properly organised, with everything close to hand. This allows you to concentrate on the most important part of the job, encouraging bites. It helps to have reserve groundbait ready, to save stopping the action to mix up more. It’s also a good idea to have a decent selection of baits set out, allowing fast changes to find what the fish want. Items associated with bait, such as chopping scissors and a catapult, should always be on bait tables or trays too, ready for action. If you want a big selection of bait, it’s better to use smaller tubs or boxes, rather than cluttering up a tray with big bowls, which don’t leave room for much else. I always have a tub full of water to keep my hands nice and clean, otherwise rod handles and pole sections get caked with groundbait and fish slime. Many anglers use lidded bait stations, which is a great idea when it’s wet, although I find flip-top bait boxes good enough.
BAGGING UP
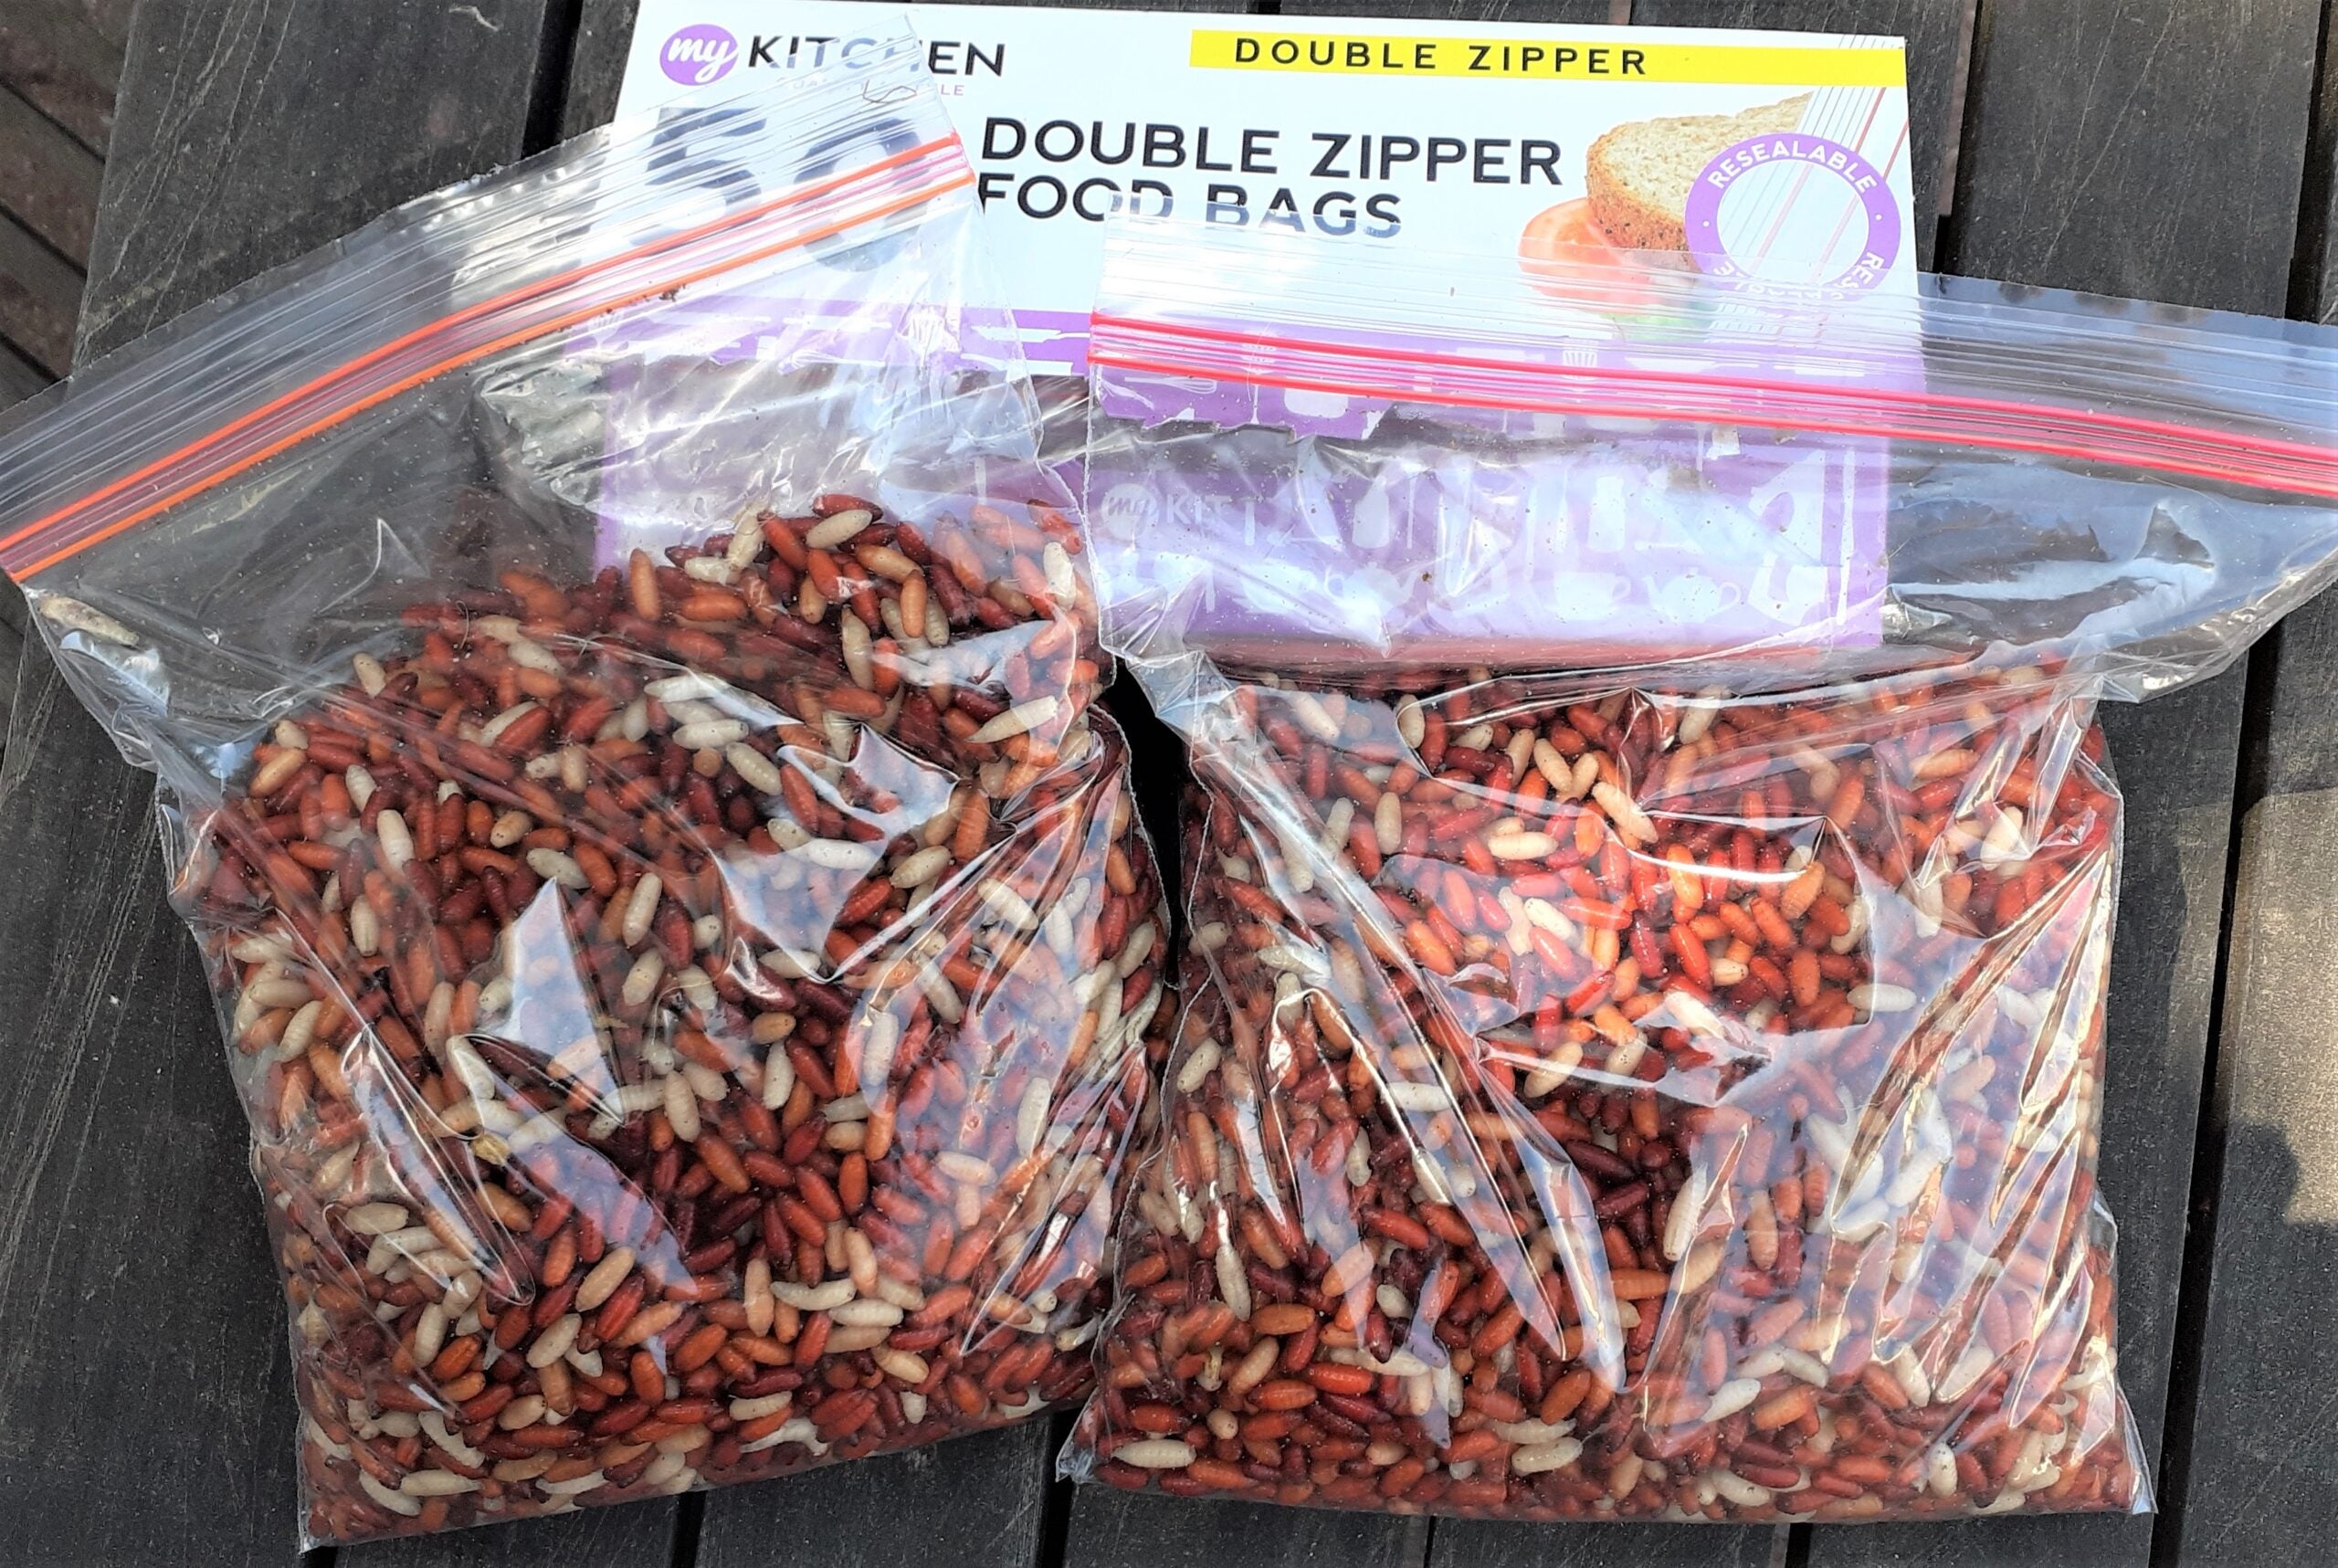
Most of us use polythene food bags to store various baits in. I first became aware of the different quality of plastic bags when I used to run a tackle shop. I noticed casters kept better in thicker types, quickly getting burn marks with thinner, cheaper options. Since then, I have discovered food bags with zippers are best for keeping casters in tiptop condition, along with many other baits. There are two main advantages with self-sealing bags. The first is they are easy to open, while basic knotted versions can prove impossible to get into without damaging. The second plus factor is casters in particular store better and for longer in zipper bags, providing you breath the bait every day and keep it in a fridge. I can keep casters in perfect condition for at least a week by using this option, while when they are kept in standard clear bags, they start to turn rubbery and grey after only two or three days. Food bags with double zips are the best by the way.
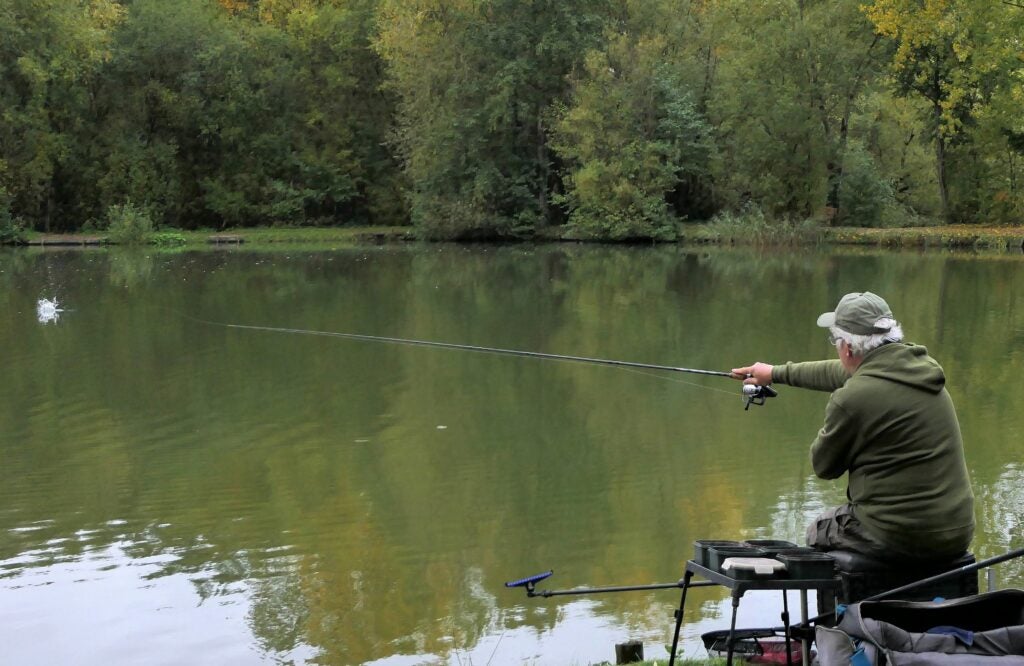
STICK & BOMB
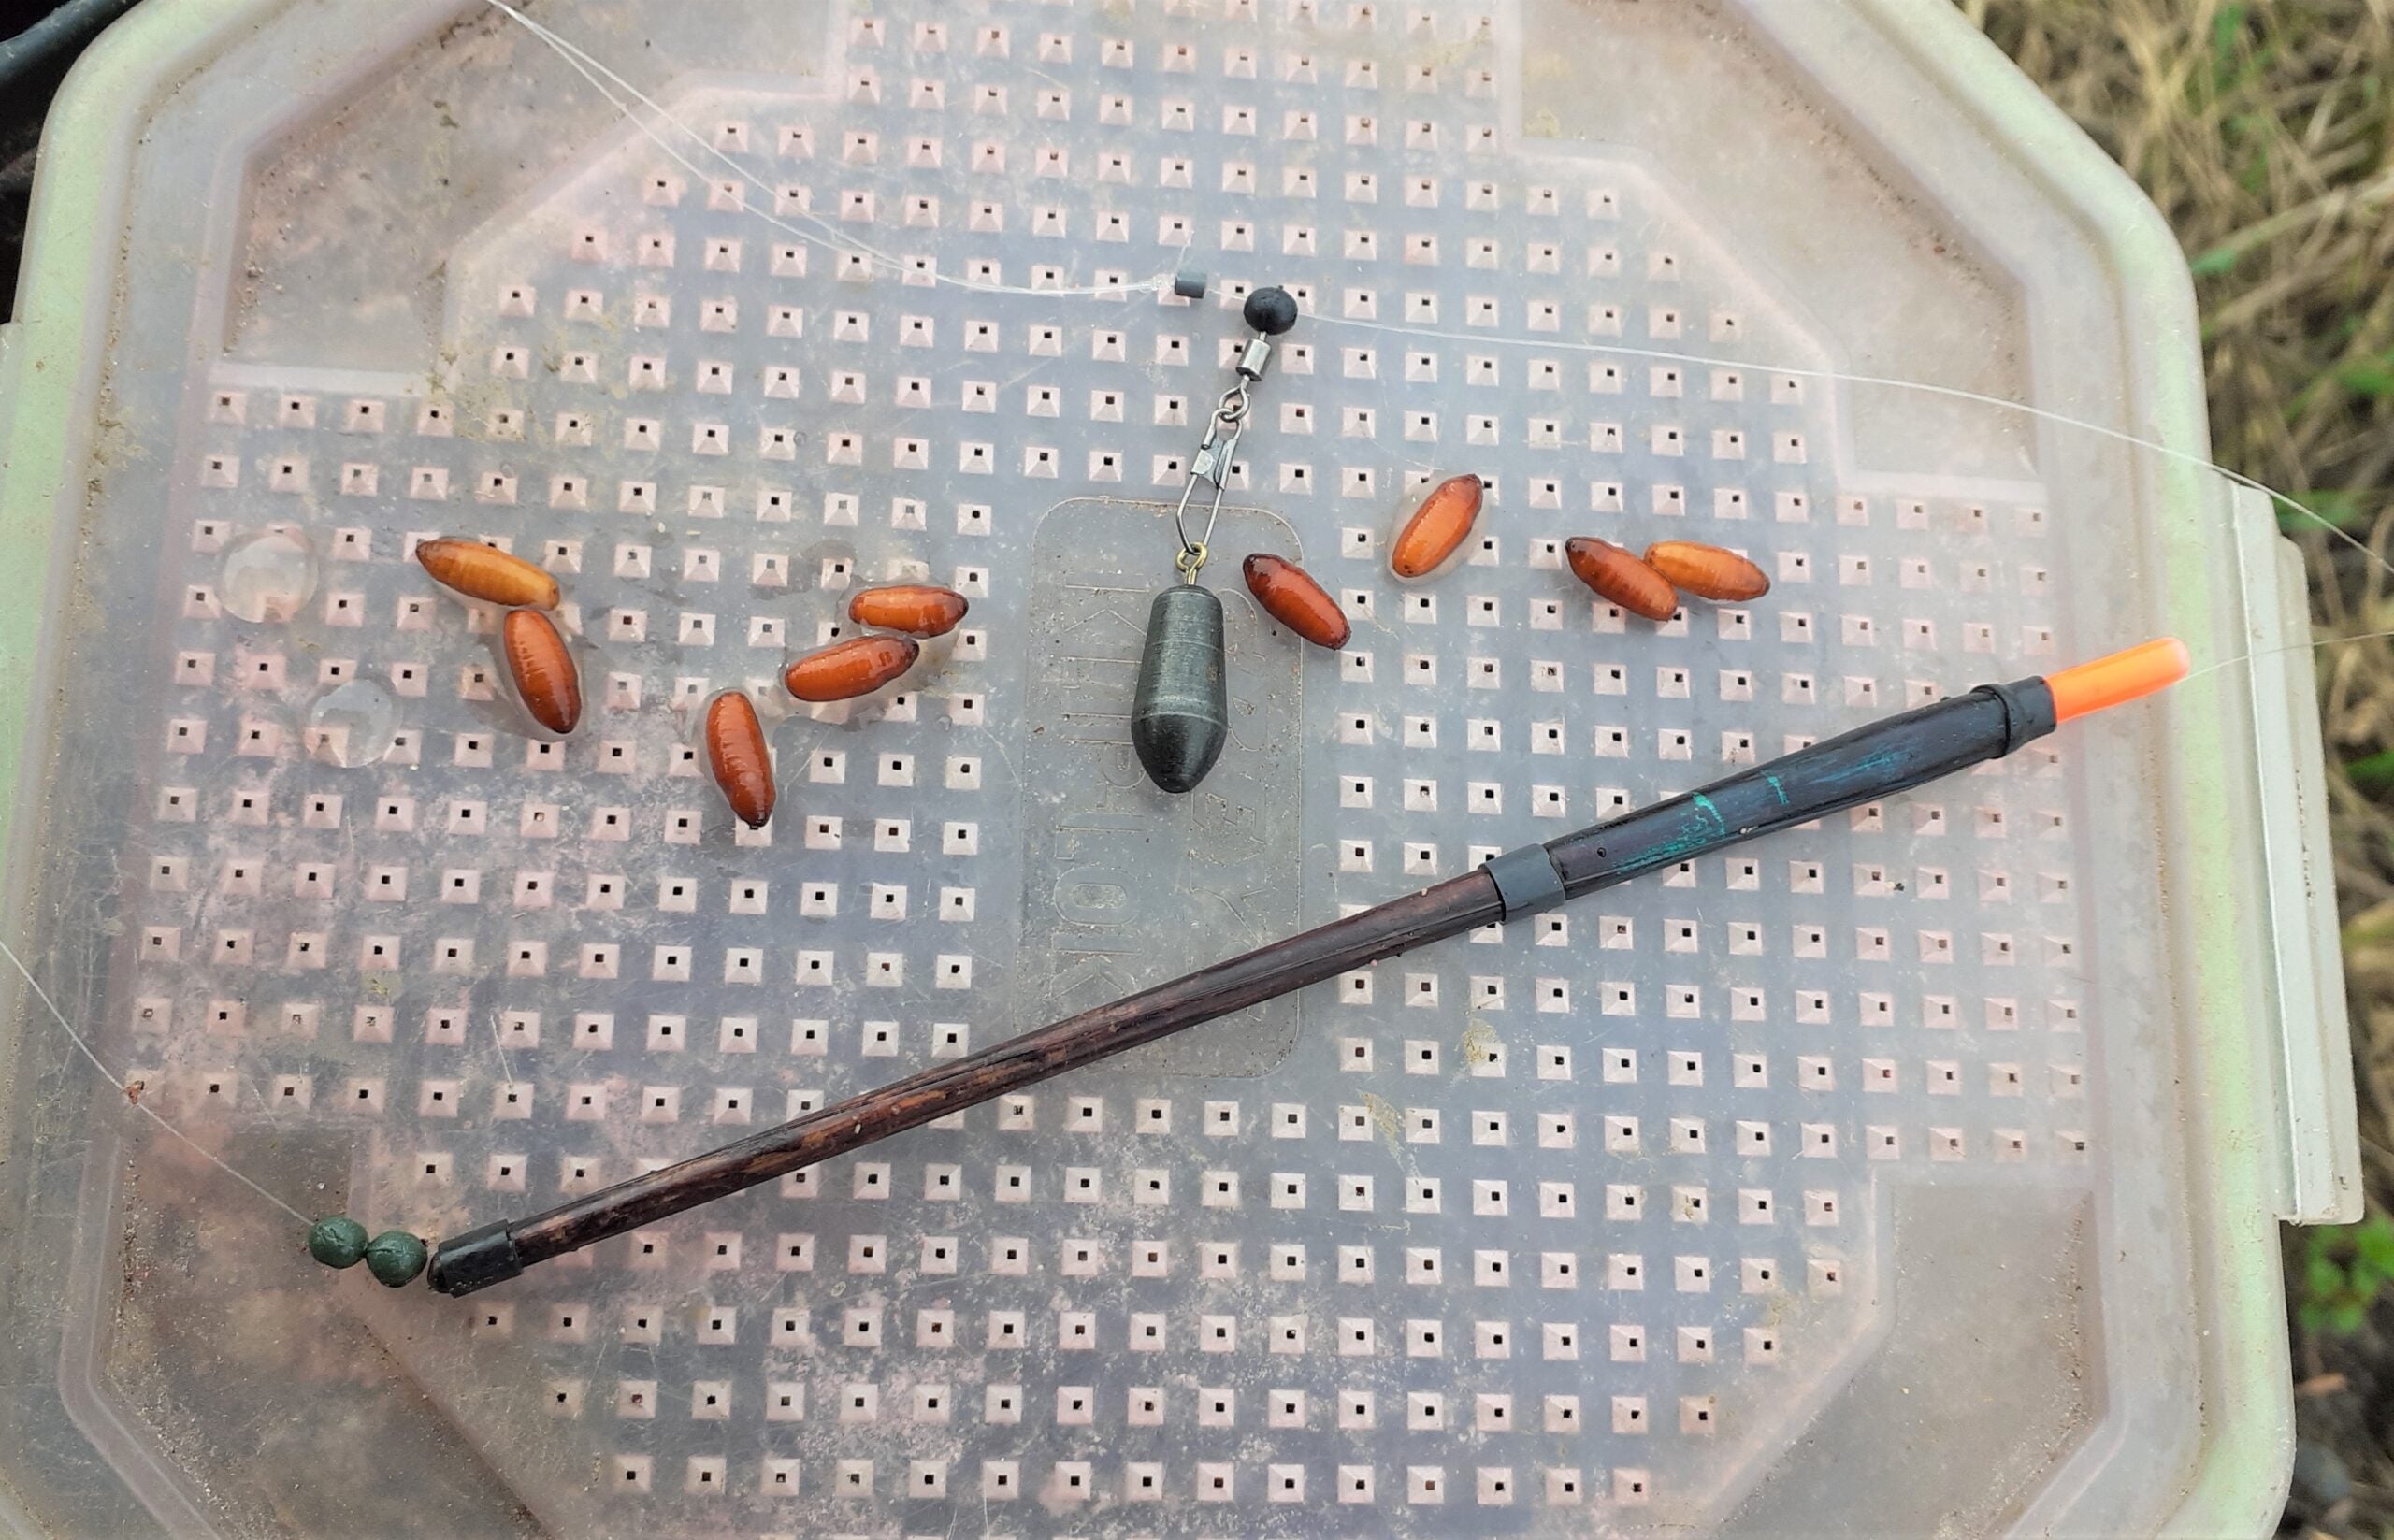
A great trick I have learnt over many years of river fishing is to bring a small bomb, or leger weight, into play towards the end of a stick float session. I normally have this tackle set up on a light action 10-11ft quivertip rod, using a free running weight and short 12inch hook length. After flogging a swim for several hours with a float, the bites dry up eventually. But by introducing something different in the form of a stationary bait, they often come back again. The best way to use leger tackle is by working it down the swim, while still continuing to feed the same way you were when float fishing. Stay with the same baits too, whether maggots or casters, even tares or punched bread. Normally there will be a hotspot that produces positive bites, where the fish are still resident in the swim, but not responding to moving hook baits. It’s worth exploring the tail end of long trots too, where bigger fish could be hanging back from the main action.
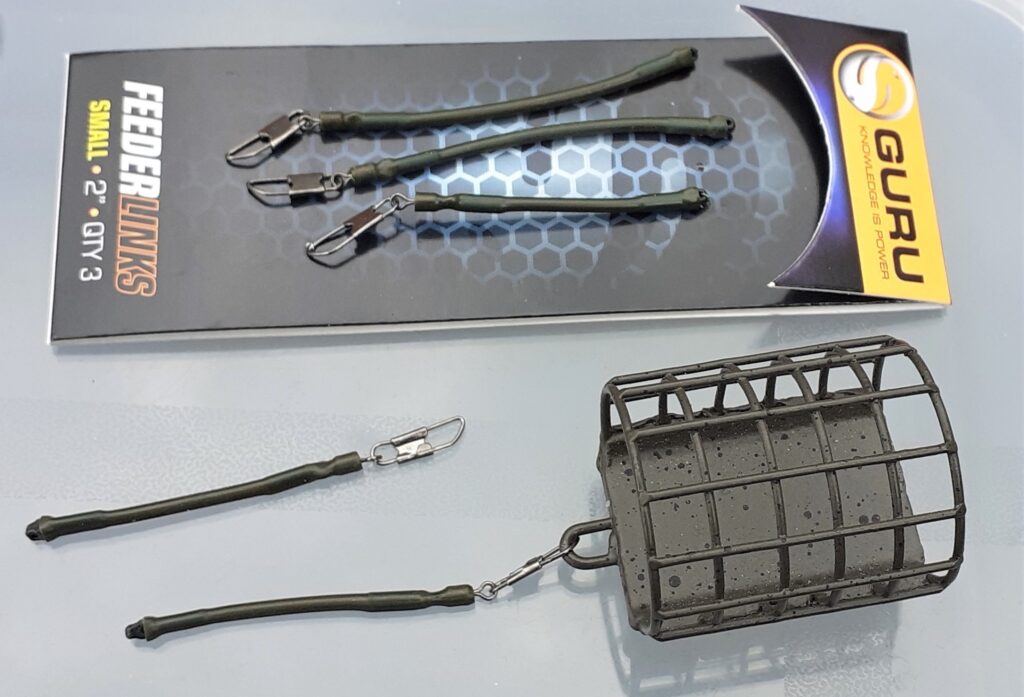
NEAT LINKS

Several companies produce feeder links, which have become very popular, although this is not a new concept. I can remember similar Powergum feeder links that were in tackle shops over 30 years ago, but the newer ones are different in that they are generally made from stiff and strong fluorocarbon. I like Guru links because they are covered in dull green shrink tube, so they blend in well with their surroundings. They have snap swivels one end and small plastic eyes the other. This format allows quick changes of feeder and to have paternoster style rigs that are free running. I like using these smart gismos with groundbait feeders, although they will work with maggot designs. They perform best if the feeder has no link, or at least only a short one already fitted to it. Apart from being able to change feeder sizes or designs in seconds, without having to break rigs down, feeder links allow a switch to leger weights to give swims a rest from regular feeding.
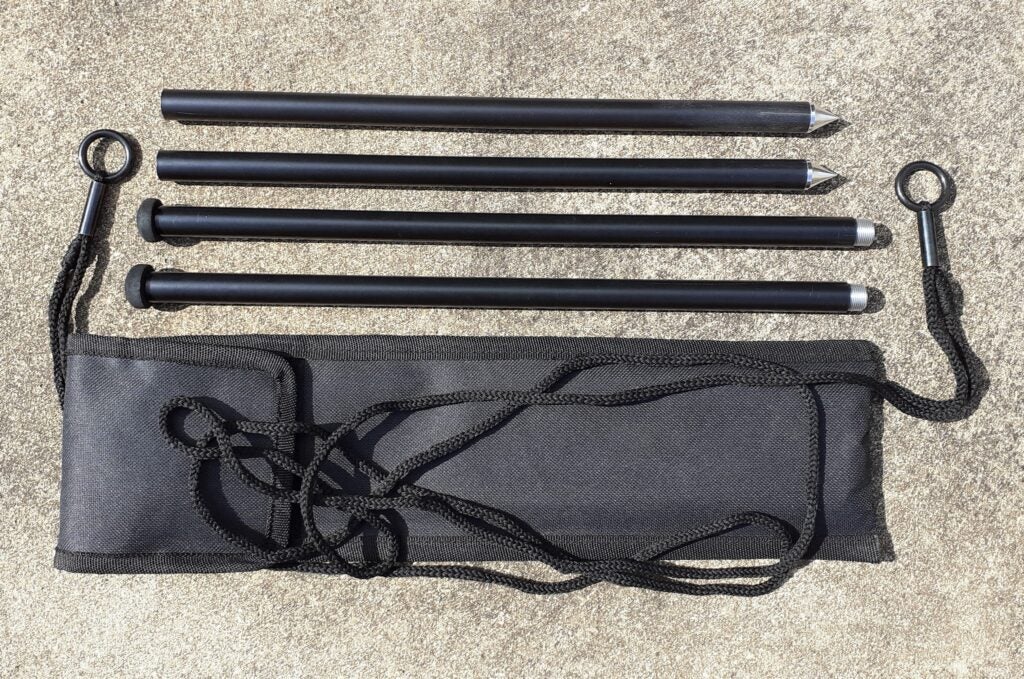
ON THE SPOT
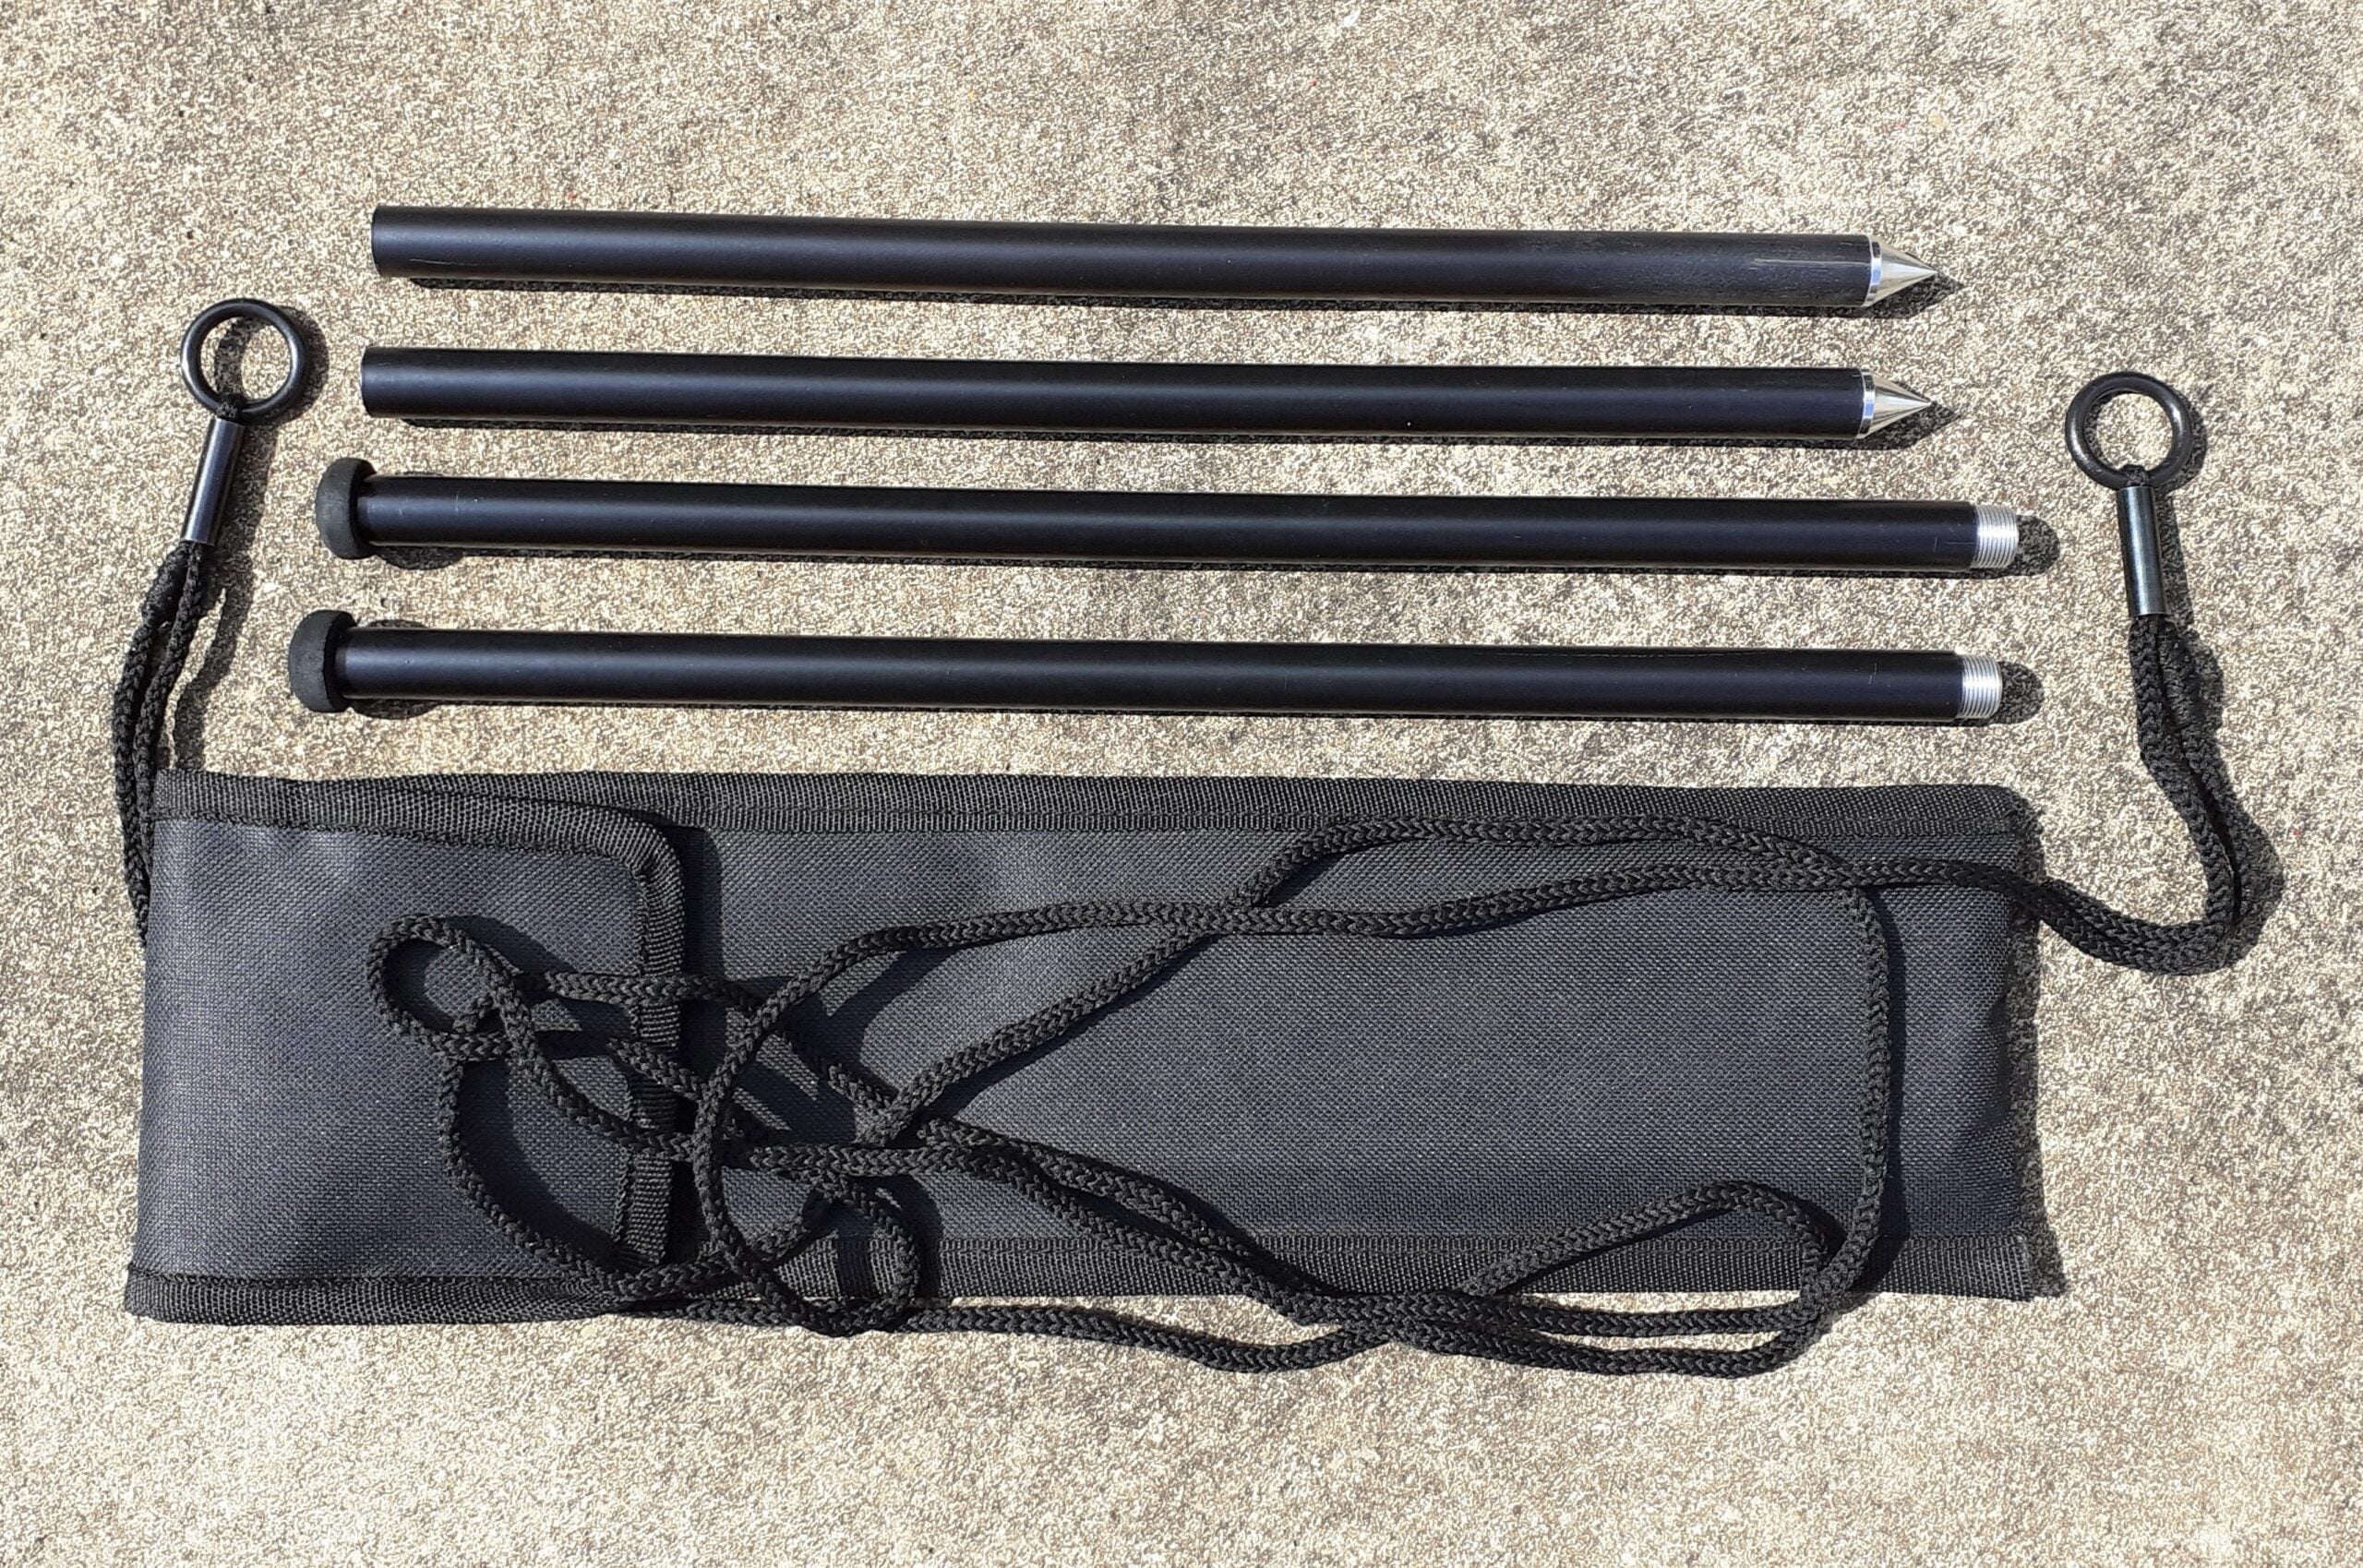
Measuring sticks help to gauge exactly how far out you are fishing. This is useful for a spodding rod, to get bait accurately where your main rig is landing. It’s handy knowing the distance anyway, in case you lose some end tackle and line, also having a reference point for return visits to venues. Feeder anglers often prefer measuring or distance sticks, because they are more reliable than counting turns of the reel handle, which used to be how casting range was calculated. Having two sticks pushed in the ground, set between three or four metres apart, allows line to be wound off your reel to find out the distance. This can be done after trial casting and clipping up the main line or braid, or before an initial cast if you know what distance you need to cover. Measuring sticks are only a starting point. It’s not unusual for anglers to tweak distances as sessions develop, unclipping a few turns of main line to see if the fish have moved further out from feed areas.
BIGGER SPLASH

It makes me laugh when I see all sorts of fancy rod movements as some anglers cast out feeders, sweeping the blank backwards and forwards while the end tackle is in flight, trying to avoid hitting the line clip too hard. Accuracy is important, along with sometimes feathering the feeder, so it lands more quietly. But on just as many other occasions a feeder crash-landing on the surface is a like a dinner gong to the fish, which associate the disturbance with free food. Method, hybrid and pellet feeders can actually work better if you splash then down noisily, pulling bites almost instantly. Providing your reel has a kind, spring-loaded line clip, it pays to let your feeder hit it and make a proper splosh! If you are worried about the clip damaging your line, wind a couple of turns of soft braid around it and trim off the tag ends. After that mono or braid shouldn’t damage when hitting the clip. It also helps if you trap reel line with two turns around a clip.
The post Top Tips first appeared on FishingMagic Magazine.
Continue reading...