| PETER JACOBS | |
These days he concentrates on his local Hampshire Avon targeting roach and chub but still finds time to pleasure-fish stillwaters on the pole and whip in between roaming the rivers with a fly rod, split cane rods and centre pin reels. |

Pole Fishing from the Beginning – part 1I FIRST TOOK to fishing the long pole in early 1990 and whilst I would not consider myself an expert by any means I do have a lot of experience using the pole for both match and pleasure sessions.
When I started pole fishing the available selection of poles on the market was nowhere near as vast as it is today with an average length of 11 to 13 meters being quite typical. Today with the advent of more modern and lighter materials, and mixes of materials, poles of 16 meters are rapidly becoming the norm, as are the composite poles that provide the ability to fish for both silver fish and carp using the same pole but with different top sets and the addition of a ‘strong’ number 5 section to stiffen up the pole. Selecting a Pole It was not too long ago that most match anglers carried two poles with one being used solely for silver fish and another being and out and out carp pole. Today however, it is possible to buy a reasonably priced pole that will work well for both target species, although I am still of the belief that any ‘tool’ designed for multi-purposes will not be as efficient for either as an individually designed tool for each. Technocrats may, and probably will, argue this point but this is my philosophy and I am quite content with my choice, not to mention that I have invested a fair amount of money in my poles and simply cannot afford to change them out just yet.
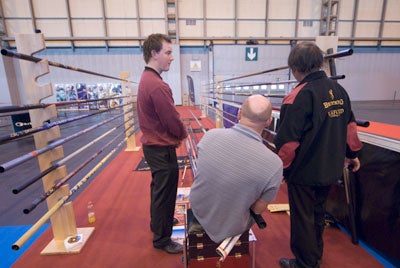
So, how do you go about selecting a pole that you will be happy with for the foreseeable future? First, you will have to be totally honest with yourself with regards to where you will fish the most and for which species, and then review the market for; a pole to fit your needs. There is no doubt about the ‘street cred’ that goes with the latest £ 2,000 worth of Milo, Daiwa or Preston pole and if you can afford it (and as long as it fits your needs) then go for it. Otherwise, leave it in the tackle shop! In keeping with buying any tackle choose the best pole that you can afford. Even though there are some apparently good buys available these days the grade of materials, the weight and the stiffness of the pole are exponentially better as the price tag rises, not to mention the quite recent development of internal stiffening rings which you won’t get on a cheap pole. My poles are: a Milo 10-10 for silver fish, a Milo Odessa for carp, a Maver Jurassic for those venues like gold Valley where the carp are a much larger average size (but I tend to use this only in the margins) a Milo Luxury 8 meter take apart pole which is ideal for fishing rivers like the Avon, and a very old Browning Titanium 11 meter pole that I bought from Jan Porter and which has been used and abused over many years and is still a beautiful pole to use when the occasion arises, even though it is a put-over design.
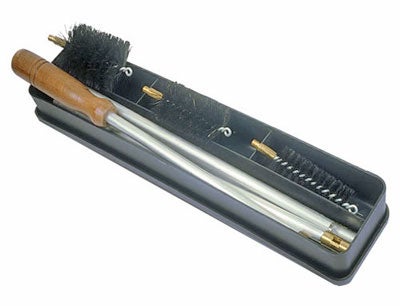
Regardless of whichever pole you eventually choose it will need more maintenance and looking after than most of your rods. If you are going to be using it a lot then pole end protectors are a great investment as is a pole cleaning brush kit. The kit contain 3 or 4 bristle head of different diameters and a range of screw-in extensions to reach inside all sections of your pole. I give my pole a good clean after every session and it really only takes about 10 minutes when you get home. When cleaning make sure that you check the elastics, the bung and the connector for any damage and if in any doubt whatsoever, then change them for new. Getting Started and Setting Up Pole fishing does require a certain amount of dedicated accessories; the least of which is not a platform or a tackle box that you can make level. There is nothing as uncomfortable as trying to fish the long pole if you are not level and this can (over long periods) lead to back problems as well as causing your arms and legs some discomfort as well.
I prefer a set up that uses both a platform and a tackle box, but either will suffice on their own. The reason I use both is that being an ex-match angler I want complete economy of movement which is achieved by having everything to hand when and where I want it. Next is a pole roller (or better still two) which is placed at a convenient point behind you coupled with a pole ‘grab’, often known as a tulip due to its shape, which is a device that holds the unshipped pole and prevents it coming off the pole roller, or worse still sliding out into the water. I noticed recently a neat little Milo device which is a small net that clamps to your platform or box and you simply push your unshipped pole into the net and it will be completely safe.
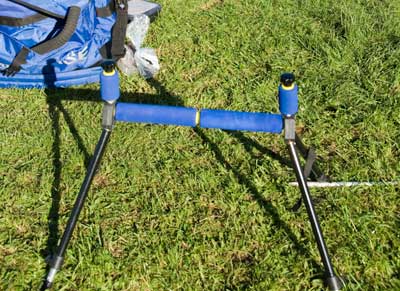
You will also need a pole rest and this can be as simple or as complicated as your desire (and pocket) will allow. Personally I use both the holder on my box as well as one of the original Octoplus holders. The reason is that I want a larger and softer rest for the main pole if I need to put it down, but then from time to time I want to rest just the top 3 or 4 sections of an unshipped pole for baiting or for rig/shot manipulation. I don’t use the type of rest that is positioned between your knees and is used to support the pole while fishing simply because I prefer to hold the pole all the time. However, I can see the potential in using one of these rests especially if you are either beginning or have any disability that might prevent you from holding your pole all of the time. When choosing your box make sure that it will let you sit in a position that allows your back to be straight and for your upper legs to be parallel with the footplate or ground. Even though I would have given my eye teeth for an 8 drawer Boss Box I am too short to sit comfortably on one, so I opted for the 6 drawer version. The main reason for this is that when using a catapult you will need to position your pole along your thigh and any deviation (as in degrees you dirty minded lot!) will result in moving your pole up and down, either way it will affect your bait presentation alarmingly. Alternatively you can opt to place the pole between your knees although I have never been too comfortable doing this.
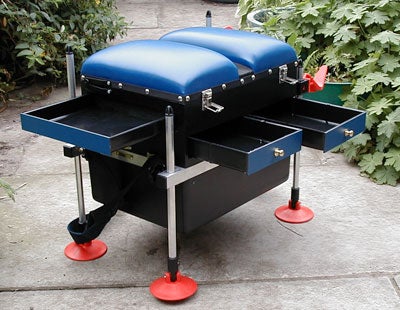
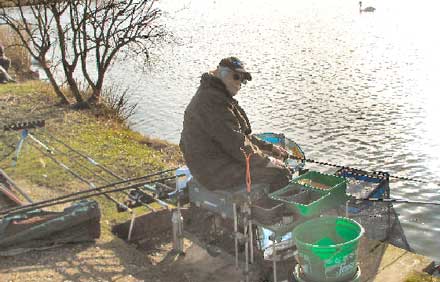
In the picture you can see my own set-up which I have developed and used over a number of years that allows me perfect control over the pole as well as providing everything that I will (or may) need for a match or pleasure session. My groundbait tray is to my left as I am left handed and far more accurate than if I had to use my right hand. Typically the two bowls will contain both a bottom feed in one and a surface mixture in the other, although on some venues both will be filled with the same mixture but made to different textures giving me the opportunity to vary my feeding if necessary. Hookbaits are also positioned to the right as I prefer to hold the hook in my left hand and hook the bait with my right. Also on the right side are my spare rigs, hooks and hooklengths, shot and shot pliers, scissors, spare disgorgers and assorted bits and pieces. These always include a wind knot needle (indispensable) and a losapiombo which is used for moving and/or removing shot from a rig and my pole pot for feeding where desired. As I hold my pole to my right hand side so my rollers and pole grab are positioned accordingly with the back roller slightly higher than the front roller as (in my opinion) it is a lot easier to ship-out from a downward angle. Two rollers do support your pole far better than one, especially in windy conditions. Behind me and to the centre is a pole roost which holds spare top 3’s or 4’s already set up with duplicate and/or different rigs. To the back left hand side is a selection of short whips (on another roost) in case the long line dries up and it is necessary to fish in close for those additional smaller, but often section winning, ‘bits’. On this roost is also a couple of whips that will equal the length of the long pole line I am fishing. This is in case the fish are really ‘having it’ and then I can switch from long pole to whip to hand and increase my catch rate but still from my long pole line. To the front and on my right I position my keepnet which also gives me a platform on which to position my landing net. A larger landing net is placed on the floor of the platform but is positioned well back only for that occasional use when needed. These days on most mixed fisheries it is almost guaranteed that when catching silver fish you will get the odd ‘lump’ of a carp, tench or bream and then you will be very glad that you set up that second landing net. Big fish and small nets are not good bed fellows! Obviously you do not have to go out and buy everything in the picture as this is/was my set up when fishing in Scandinavia and Europe where you don’t often get the luxury of ready-made wooden platforms but are more likely to face a 15 When you purchase through links on our site, we may earn an affiliate commission, which supports our community.
|