How to take your own Trophy ShotsOK, SO WE’VE been lucky enough to catch that fish of a lifetime, but no one’s around to help you to take a few snaps. I’ll try and give a few pointers on what to do.Things you’ll need
There’s no excuse for poorly framed shots with modern digital cameras these days. Try and get at least a 5 megapixel camera – but don’t be swayed purely by the pixel count. As with normal film cameras the lens is the most important (and probably the most expensive) part of the camera. The second most important (and expensive) thing is the quality of the chip that reads the light coming in and the software that processes it – that’s why there are 6mpl cameras at £ 60 and some at £ 600! Always take the photo at the highest possible resolution – you can make a picture smaller but you can’t add something later.
Try to get a camera with a screw-in remote attachment. Trying to take pics of fish with a self timer is a waste of time and possibly harmful to the fish with all that constant picking up, putting down and running back and forth to set the camera. In the 45 seconds or so it takes to take a single self-timer shot, I can probably take all the shots I want – I also don’t get the fish jumping, slapping me in the face, etc, type shots as I just won’t take the shot if it’s not on!
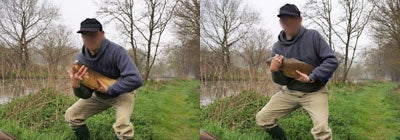
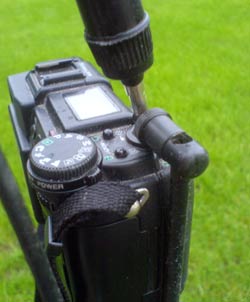
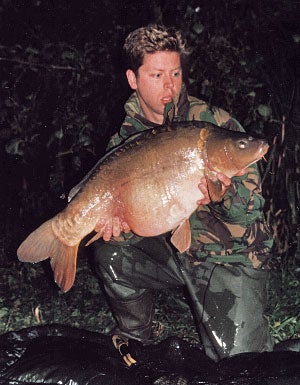
I don’t like infra red remotes as I feel they stop you holding the fish properly; I prefer to use a bulb release placed under my foot. None of the cameras I’ve owned have had the screw connector for the releases, but luckily the release that Jessop’s sold (maybe they still do) for the Canon EOS’s I’ve owned also works for the cameras I have now (see pics). OK, so you’ve got the fish in the net, which is the best place to leave it for now – providing the margins are deep enough. I stick a bankstick through the gap between the spreader block and the net to keep it secure. Find a suitable place to take the pic – preferably without the water in the background as it can mess up the camera’s light sensors – and preferably without the bivvy/brolly/chair/beercans strewn around as it looks rubbish and some of it is! At night, try to have reeds or a bush behind you as it’ll reflect some of the flash and improve the contrast of the shot.
The two shots of me were taken about half an hour apart, and if you notice the colours are better in the one with the reeds behind me. The only difference was that the rain would’ve been hitting the lens, so I had to turn the camera around and there wasn’t anything to reflect the light (sorry the quality’s a bit rubbish, but they’re scanned photo’s). Also, try to have the camera at a slight angle to the fish, which should help to stop a lot of the ‘flare’ as the light gets reflected back from the fish. Next, put your mat down and put a 3ft bankstick just behind where you are kneeling. Place the camera on the tripod 6ft or so back, and use the edges of the mat and the bankstick to frame the shot. This is where taking the shot in the highest possible resolution will help, as you can allow a couple of feet around the edges, and crop it later without losing any quality. When framing the shot, keep the camera centred on the middle of the bankstick – this should ensure the camera will focus and take the readings from the fish, rather than you or the background. Its important to do all this with the bulb release already attached, or you’ll only have to re-frame after you jiggle the camera around!
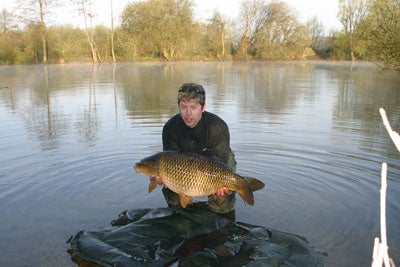
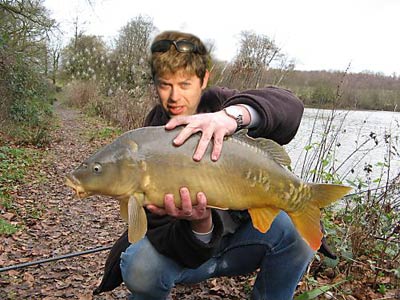
Place the weigh sling on the mat – this’ll make it easier to turn the bigger fish around, and means you can easily weigh it and return the fish without having to keep swapping stuff around. Take off any watches or sharp objects you are wearing. Crouch down with the bulb release under one foot – you might have to make sure there is something hard underneath it to make it work. When you pick the fish up, put one hand around the pectoral fin, and one around the anal fin. Many anglers advise you to keep the fish as close to your body as possible, but I find at forearm’s length is better, as its easier to roll the fish back towards you if they are flipping about. Don’t hold the fish at arm’s length to make them look bigger – the ‘banana fingers’ are a dead giveaway!
When you are ready, simply hold down the bulb release – most cameras will keep taking shots until you take your foot off, and in-between shots change the angle of the fish slightly – you will find there is always one shot that catches the light better. Put the fish on the sling, turn the fish around and do the other side (if you need or want to) and when finished, the fish is easily weighed and returned – the whole thing taking no more than 5 or 6 minutes. Most mistakes with fish care are when people panic – getting everything prepared before the fish is on the mat is probably the most important thing, and when the fish is on the mat, don’t be afraid to let it calm down if it’s flapping about; a wet sack or folding the mat back over it will help calm it down.Likewise, if the fish is really not being helpful, just get one shot and get it back in the lake – it’s not worth harming the fish for a pic. When you purchase through links on our site, we may earn an affiliate commission, which supports our community.
|
Welcome!Log into your account