| IAN GEMSON | |
Ian’s friendly and patient personality led him naturally into teaching. He has completed the Professional Anglers Association (PAA) level 2 coaching course organised by 1st4Sport which officially qualifies him as an angling coach. As a result of this accreditation Ian’s company, Smart Carping, is able to offer £ 5 million public liability insurance and has passed the CRB (Criminal Records Bureau) check. |

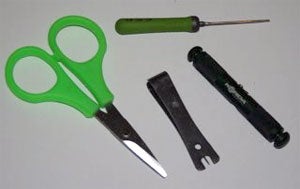
How to tie the Knotless KnotA knotless knot is at the heart of carp angler’s rigs. This simple rig is devastatingly effective and if tied correctly ensures positive self hooking capabilities.What you will need Tools
1. Sharp braid scissors
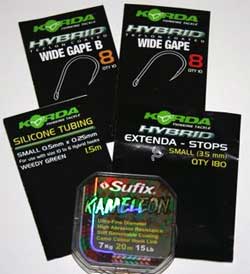
1. Hooks
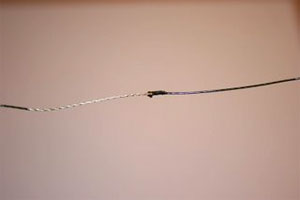
Cut enough hooklength for you to be able to work comfortably with the braid; about 30-35cm is fine. Then strip about 12cm of coating off the braid.
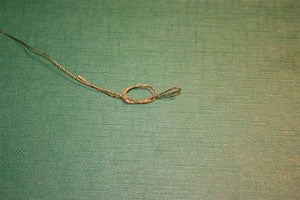
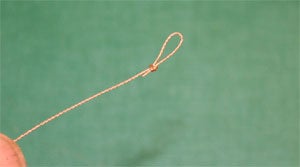
Tie a loop using an over-hand knot in the stripped end of your selected hooklength material. This loop is for your boilie stop to secure the boilie in place.
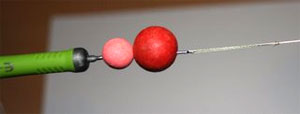
Using a boilie needle, thread the bait onto the hair. Because I am using two boilies on this hair I have left a very long loop. This will hold both boilies in place and ensure they don’t move during the cast and therefore change the mechanical properties of the setup.
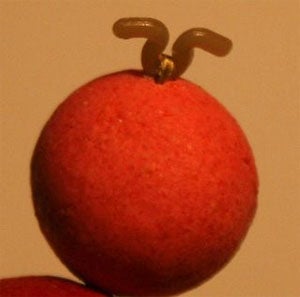
Once the boilie has been threaded on to the hair a boilie stop is pushed through the loop to secure the boilie in place.
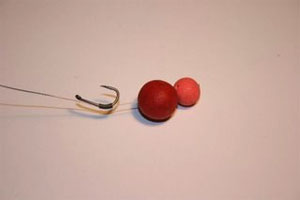
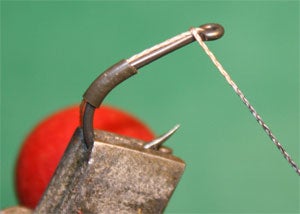
Thread a small piece of silicone tubing on to the hooklength and then on to hook. Adjust the length of the hair to your desired length; 1-2cm from the bend of the hook is a good starting point.
Once you have got the required hair length, pass the hooklength down through the eye of the hook.
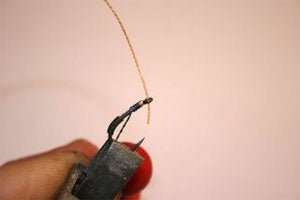
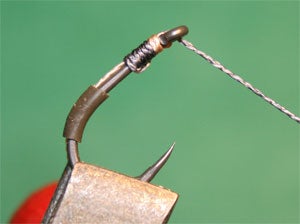
Start whipping the knotless knot by winding the hooklength towards you as shown. This is to prevent the hooklength from getting trapped and cut by the gap in the hook’s eye as it meets the shank of the hook.
Make a minimum of 6 turns down the shank of the hook, trying to keep the line tidy, then pass the hooklength down through the eye of the hook before you tighten down.
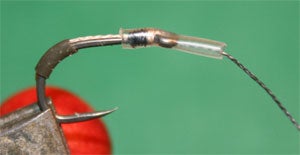
Cut a 15mm length of clear heat shrink, pass it over the hooklength and down over the eye of the hook such that it is just covering the end of the knot.
Carefully steam the heat shrink down over a kettle and allow to cool. Whilst cooling, hold the hook and pull the hooklength down to form a gentle downward-facing kick.
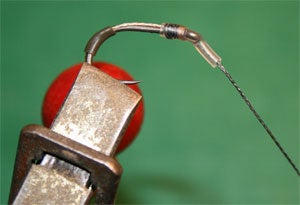
Now tie an overhand knot in the end of the hooklength, setting the length you require at the same time. Trim off the excess hooklength.
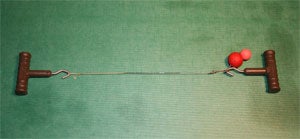
Test the strength of you rig to ensure it is safe to fish with by using a set of rig pullers.
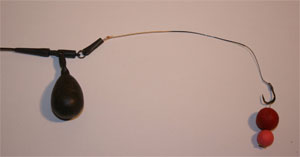
Once you are happy with your rig you can connect it to your lead system and cast it out to the hungry carp! | |||||||||||||||
|