


IN PART 1 I showed you how to elasticate the margin pole, but the same instructions can be used for any length of pole. The same can be said about fishing with the margin pole in that you can use it exactly the same as a normal long pole, it’s just that margin poles are normally much shorter. Shorter and cheaper, better for those who haven’t tasted the delights of using a pole before or those who might find a long pole too much to handle. The longer ones can put a strain on your back.
The most important lesson about fishing the pole, long or short, is – to sit correctly!
Are we sitting comfortably, children?
Your box must be at a height where your feet are flat on the floor with your legs at a right angle to your thighs. You should hold the pole (this is for right handed people) across your right thigh with your right elbow steadying the back end of the pole and that arm stretched forward and gripping the pole from on top. Your left hand should cup the pole just slightly forward of your right hand and that is the hand that will create the strike. (see picture)
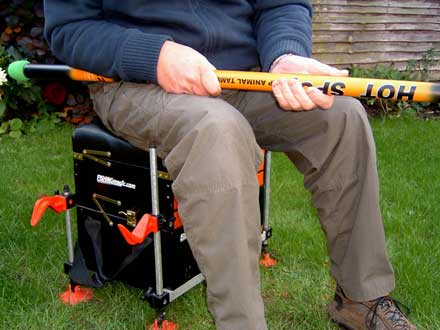 It’s important to sit correctly |
I’ve mentioned that first so that you make sure you sort your box/seat out first. It is most important that you are sitting comfortably and not straining your back otherwise the day after will be very painful for you and your days with the pole might be numbered. I sometimes suffer from a bad back through all manner of silly manoeuvres, but get the sitting correct and the pole won’t be responsible for back pain.
Now to fix a pole float rig. You can buy readymade pole rigs, which now come in all shapes and sizes. Often you will see them marked as being for canal, or lake or carp, along with the length, hook size and line strength. If you are buying readymade rigs look for a quality make that you feel you can rely on, but as in all fishing tackle, making up your own gives you the freedom to use the line, float and hook size that suits you best.
How to make up a float rig
It’s best to do this at home in good light because some of the items have very small holes and float rubbers have fine diameters. I need my contact lenses in and my reading glasses on in order to make them up. You will need a float, some pole float tubing, the hooks, the line, possibly a separate and weaker hooklink material, a rig holder and (not in the picture) some split shot or, if you really prefer, olivettes or styls. I’m going to use split shot.
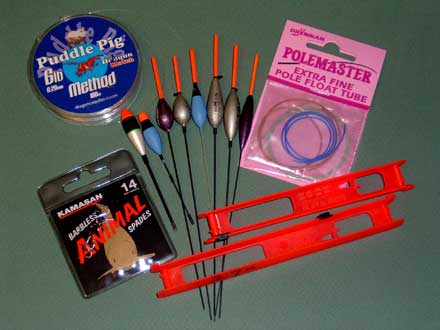 Pole rig materials |
Pole floats come in all shapes and sizes. You might find some where the body is fatter at the top and tapering down to the bottom. These are known as ‘shoulder up’ and are more or less intended for river pole fishing as you can hold them back in the flow. Others are more for pond and lake fishing (as in the picture – left to right), the first two being dibbers for meat and heavier pellets, the next three for baits like sweetcorn or small pellets, the last three could be used for maggot or casters. There is no hard and fast rule so use whatever you think appropriate, but just remember that the heavier your bait, the more buoyancy the float will need to hold it.
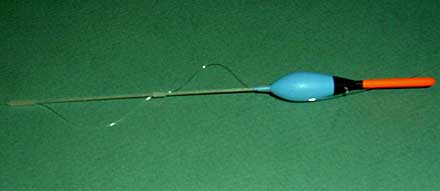 Silicon float tubing |
The first thing you need to do is to find a size of silicone float tubing that fits over the lower stem of the float tightly, but not so that you can’t easily manoeuvre it along the line. Cut off two short pieces and a slightly longer piece for the end and put these to one side. Thread your choice of main line through the small eye on the float (top side first) and then thread the two shorter lengths and then the longer piece of tubing onto the line. Slide all the silicone tubing onto the float as in the picture, when you pull it all tight the float can slide up and down to adjust the depth at which you will fish.
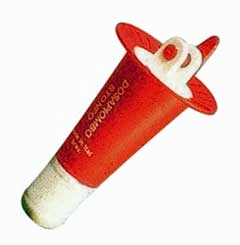 A Dosapiombo for precise shotting of a pole float |
Now if you wish you can fix a hook direct to the end or use a lighter hooklink and fasten it to your rig via the loop to loop method. To shot the float precisely you can use a device called a Dosapiombo (about £ 6), but I just use the shot weighting on the float to calculate what shot I’ll need to get the float roughly right. Say you have a 0.7 gram float, then I would probably apply two no.1 (approx 0.3 gram each) shot and a number 8 (about 0.08 gram). I can easily correct it when I get to use it, but if it’s over-shotted there is a little trick – see later.
Almost done now, you need to measure out the length of line you will need to cover the section of your pole, usually the top 2 or 3 sections are around two to three metres. You can measure it directly against the made up sections if you like and once you have cut it, tie a small loop in the end to go into the Stonfo connector. Take the winder (I’m using Boss/Daiwa winders), insert the hook through the little triangular cut out and start to wind the line around the winder.
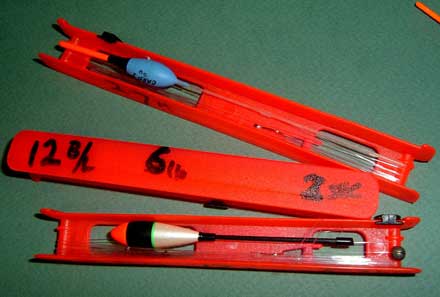 Pole float rigs made up on winders |
The float should lie on the deeper side of the winder. When all the line is wrapped around it, tuck the end loop in the sliding catch mechanism and tighten it to hold. If you use other types of winder you may need some elastic anchors and these simply tension the line and the hoop in them goes onto a spike on the winder. Write the detail of line strength, hook size (note if it’s barbless), and length on the side of the winder in permanent pen marker. If you want to rub off old details use some white spirit.
Setting up for fishing
Take out a float rig of your choice and release the end loop. Push back the sliding cover on the Stonfo connector and tuck the loop into the exposed mouth, slide the cover back over the mouth and the loop is now fixed. Unwind the remainder of the rig and you’re ready for fishing.
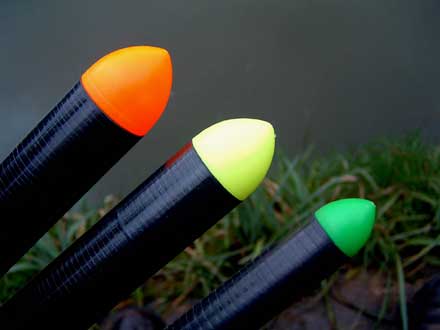 Drennan Nose Cones to protect pole joints |
Put a bait on your hook, hold the top sections like a rod and flick the bait out, not too hard, into the water. Add another section and start to push the pole out adding further sections until you have the pole at the length required. It’s a useful idea to buy some Drennan Pole Cones as they help you to centre the male joints to the females to avoid damaging the carbon. You will need to take the pole to your tackle shop and try the cones for a tight fit, if they are just a smidgen slack you can wrap some PTFE plumber’s tape around them to ensure they stay put in the pole joint.
I also wrap a little length of electricians insulation tape in a nice bright colour around the female 4th joint as this not only adds a little strength to the female, but also acts as an indicator that you see out of the corner of your eye to tell you exactly where the joint is. This is useful when fighting a difficult fish and you’re breaking off (not literally) the last sections before netting it. It also helps if you have different joints (just the top ones though) marked with different colours so you remember that it’s the green joint or red joint, for example, when you need to re-bait.
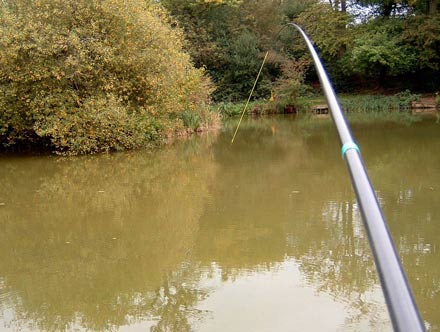
 It’s a margin pole so fish the margins! |
Well, it’s margin fishing and that pole float should be in the margins. The beauty of a pole is you can literally position the pole float, and therefore the bottom bait, exactly where you want it to within an inch. You may remember another feature I wrote where the float was so close in I was actually entangled with the reeds on the bank. If there’s two feet of water straight off the bank, you can bet that carp will patrol those areas.
Just keep feeding small amounts of loose bait around the float and wait. I said earlier that I have a little trick if the float is a little over-shotted, but it’s not mine really. Just smear a little Vaseline over the pole float before you ship it out, this will give it extra buoyancy and help you see the float tip better. All matchmen do this and Preston actually make a float grease that is available in fluorescent colours so you can match it with the pole tip.
Fighting carp on a pole
When you get a bite from a carp, typically the float disappears and that’s it, you hardly need to strike, just lift the pole and your elastic starts stretching out and you wonder at first if it can handle the fish. Be assured that an 8-10s elastic will handle most carp up to 8lbs or so and a 12s elastic can handle fish into low double figures. In fact, my rule of thumb is generally the number of the elastic can be translated directly in pounds weight of fish, therefore a 16s elastic could handle a 16lbs carp although I have never caught one over 12lbs and therefore never felt it necessary to go over a size 12 elastic.
 Fish on and out goes the elastic |
Please don’t be guided by what you hear from some ‘experienced’ pole anglers in that if it takes more than five minutes to land a fish you need a 20s elastic. That’s garbage, all you need do if the fish goes on a run is sink the pole tip and first sections under water, the fish comes back like a little puppy, usually. Treat him kindly and you’ll have him in the net without the need to bully him at all and that way will lead to less mouth damage.
So the float shoots off, the elastic comes out, get the fish into open water and away from reeds and lilies as quickly as you can and keep him there. As he tires a little you can lift the pole to keep him up in the water and if you can get him to breathe some fresh air he’ll soon be beaten. Never point the pole at the fish, always keep an angle to it and let both elastic and the pole do their job. Bring back the pole and remove one section at a time laying it beside you (where it can’t be trodden on) ready in case he shoots off again and you need to re-attach it.
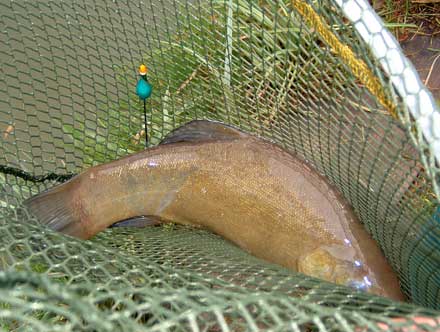 It’s not all about catching carp |
Place the landing net in the water ready and when you have him tired out, slip it under his body and out he comes. It’s normal practice to unhook the fish in the net, but if that’s not comfortable for you then lay him on an unhooking mat to get the hook out as quickly as you can. Then release him back in the water, or in your keepnet if you’re in a match.
That’s it, your first fish on the margin pole, and wasn’t it easy?
Extras
There are a few more bits and pieces that might help you to use and take care of your nice new pole. An adjustable Seymo pole protector, the green blob you can see inserted in the butt end, it will fit a range of apertures and it stops you from damaging the pole when you ship it back. There’s also various makes of pole pots that clip onto the top end of the pole, you load these with loose feed (see pic) and tip them in over your float.
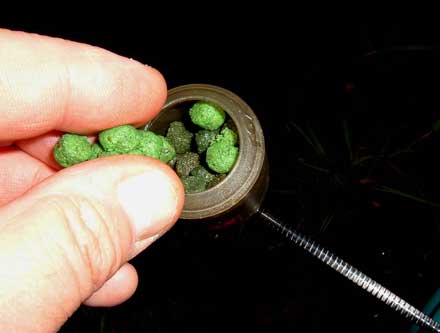 Don’t forget those useful extras like pole pots |
There’s also pole rollers to put behind you to help shipping back and what is known as a ‘tulip’ grip (because that’s what it’s shaped like) to hold the pole whilst you re-bait and there’s also a Seymo Smiley for a front pole rest. You can also buy Preston Slip elastic lubricant to ease the stretching of the elastic through the bush and those red clamps on the side of my box are also for holding the pole when I have a sandwich.
All little things that can help, but whatever you do, enjoy your margin fishing, it’s exciting.