In the final part you learn just what a baitcaster is and how to load it with line correctly.
Not quite as popular over here, but in the USA they are the #1 selling reel. Perhaps that’s because when most Americans go fishing it’s with lures of every kind that need to be cast and worked back on the retrieve. Tell an American you’re float fishing and he’ll think you’re working a lure from a boat.
Basically, they come is two slightly different styles. The bigger versions like the Shimano Calcutta and Abu 5000/6000 series that sit well on top of the rod (the rod being held upside down too, just to confuse you). Then there’s the new low slung varieties with smaller spools where the side mechanism seems to hang off the rod, but both work in identical ways.
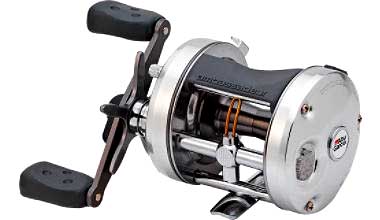
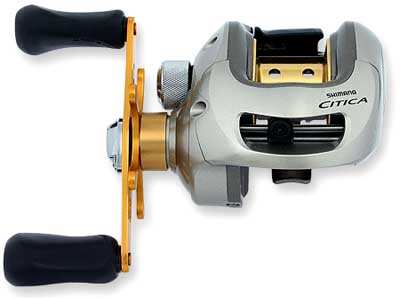
What you might find to the side on the low slung models is a magnetic overrun management system, this is a dial and numbered around the edge, usually. The higher the number you turn it too, the more magnetic force is put on a free-turning spool to stop it over-running and giving you what is known as a “bird’s nest”. This is where more line has come off the spool than the flying bait can take up and the loops of line wrap around the spool like a bird’s nest.
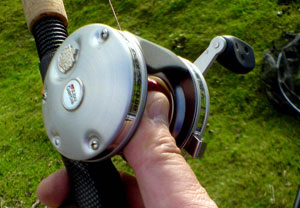 You will know when you get one and rest assured, you will get one, we all have. The way to avoid these is to keep your thumb over the spool and the first sign of any loops forming on the cast, let your thumb act as a brake to slow the turning spool. The other part on the reel is a spool tension device, just a thumb screw and you tighten this so that when the bait hits the water, it stops the spool from spinning completely.
It’s all a matter of practice to get all of these functions working together and for you to develop what has been called “an educated thumb”.
Onto the loading
It’s because these reels are largely used for lure fishing that most are filled with braided line as opposed to monofilament. Not only is braid softer, it’s comes off the spool nicer and seems to me, at least, easier to put the brake on a spinning spool with your thumb. You can also get braid in a much heavier breaking strain (BS) for its diameter and that helps with the smaller low slung type of baitcasting reel.
For all the other benefits of using braid read part two – loading fixed spool reels.
It would be rare indeed that anyone would want to cast a lure more than 50 yards simply because you can’t work it properly at that distance. All you can do is wind it back and trust it’s behaving to some extent like a wounded fish or other creature. Given that then and the fact that you need a few more turns to allow for a running fish when it takes the bait, 70-75 yards is generally sufficient for a reel.
Choose a breaking strain that will suit the purpose to which you are going to use the line. For example; for lures up to 1 oz (28-30grams) you might well get away with a minimum of 20lbs BS braid, for lures up to 2 ozs (56-60grams) you might well chose a 30-40lbs braid. For anything heavier, go for 60lbs braid as a minimum, if only because to lose lures at that weight costs a small fortune.
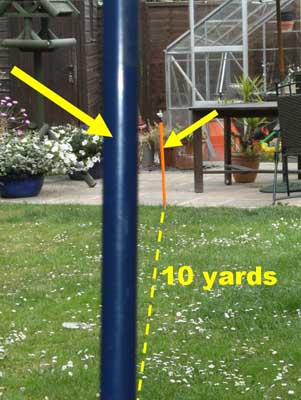 Buy the line on a 150 or 300 yards/metres spool, that way you may get two or four loadings out of it. If you have a garden long enough, put a bankstick at one end then measure out ten yards and put another bankstick there. Best to use a tape measure, don’t stride it out with your feet.
Tie a loop in the lead end of the braid coming from the new spool and loop it over the far bankstick. Then, allowing the spool to turn freely between your fingers, walk to the other bankstick and take the line around that. Do this until you have 7 full lengths of line and a further 5 yards or so.
It’s as well to wind on a little monofilament onto the spool of the reel first; it needn’t be much, just enough to cushion the effects of the braid and to pack the spool out a bit first. You can use almost any old monofilament for this job seeing as you will not see it again until it comes time to change the braid. Wind it on as you would with a centrepin reel, not too tight.
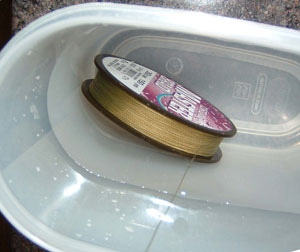 Now, tie the braid to the monofilament and start to wind it through your thumb and forefinger to keep a little tension and by walking around the banksticks as you go. If you can wet the braid with a hose first then all well and good. If it’s the remaining 70-75 yards on the spool, then use something like a cereal storage tub half filled with water and throw the spool of line in that (see picture).
As you wind it onto the reel, watch the edges. Although most of these reels have a level-wind system, they often don’t go to the very edge of the reel’s spool. You may have to make a correction in the early turnings by forcing the line over to the left and right as the level-wind gets there. This will ensure that the line lay is fairly level before you start fishing.
When you’ve finished, don’t forget to mark the spool of line if there is any left on it to suggest that it’s not a full spool any longer.


